
Knowing how to clean AC condenser unit fins and coils is one of those jobs that looks more intimidating than it actually is. I could still mostly see through the fins. But that’s exactly the misconception most homeowners have. It doesn’t take a lot of buildup to start choking off airflow and making your system work harder than it needs to.
Once I opened the top and looked inside, I understood. There was a whole second row of coils that never would have gotten clean from the outside. I vacuumed out the pan, hit both rows with coil cleaner, rinsed it out, and the system has run noticeably better since. The whole job took about 30 minutes.
This guide walks through exactly how to do it right — including the two-row coil situation a lot of videos skip over entirely.

Yardtally is reader-supported. Some links on this page are affiliate links. As an Amazon Associate, Yardtally earns from qualifying purchases. See our Affiliate Disclosure.
What’s in This Guide
- Why Cleaning From the Outside Isn’t Always Enough
- What You Need to Clean AC Condenser Unit Coils
- How to Clean Your AC Condenser Unit — Step by Step
- Signs Your Condenser Unit Needs Cleaning
- When to Call a Professional
- Frequently Asked Questions
Why cleaning from the outside isn’t always enough
Most people spray down the outside of the unit with a hose and call it done. That works fine if you have a single row of coils — but a lot of units have two rows. If yours does, cleaning from the outside barely touches that inner row at all.
The only way to know is to take the lid off and look. Once you’re in there, you can also clean out the drain pan at the bottom — something you can’t do at all from the outside. If your unit sits under a tree, that pan is probably packed with leaves, debris, and the occasional dead frog.
According to the University of Illinois System’s EnergySense program, a buildup of dirt and dust on condenser fins acts like insulation — it blocks airflow and prevents heat from dispersing, which forces the compressor to run harder and wastes energy. Cleaning once a year is one of the easiest ways to reduce that strain.
What you need to clean AC condenser unit coils
- Work gloves and safety glasses (the coil cleaner can splash back)
- Shop vac or any vacuum you can get a hose down into the unit
- Frost King ACF19 Foam Coil Cleaner
- Garden hose with spray nozzle (set to shower mode — not jet)
- Klein Tools 7-in-1 Ratcheting Nut Driver
A note on the nut driver: most AC condenser lids use 5/16″ screws. The Klein 7-in-1 handles this perfectly and makes the job much faster. Use it to remove the screws — but when you put the lid back on, hand-tighten only. A drill or impact will strip the threads in the sheet metal and then the lid won’t sit securely.
How to clean your AC condenser unit — step by step
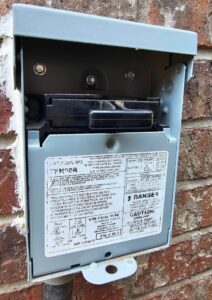
Step 1 — Cut the power (don’t just turn off the thermostat)
Turning off the thermostat is not enough. Your AC unit has a disconnect box mounted on the exterior wall right next to the unit — pull out the handle or flip the switch to cut power there. You can set the handle on top of the box or flip it upside down and reinsert it so power can’t flow.
Since you’ll be working with water nearby, close the disconnect box lid. There’s still electricity running into part of that box even with the disconnect pulled, so don’t leave it open.
For extra peace of mind, also flip the dedicated AC breaker in your main panel.
Step 2 — Remove the lid
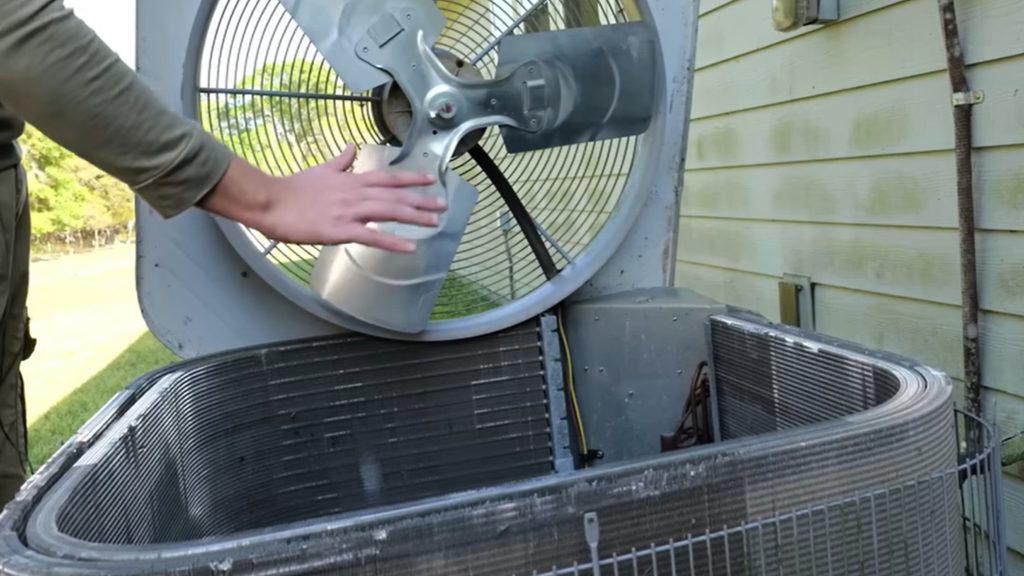
Using the Klein 7-in-1 nut driver, remove all the screws around the top of the unit — typically 8 to 12, all 5/16″. Set them somewhere you won’t lose them.
When you lift the lid, be careful — there are wires and conduit running down one side. Don’t put any strain on them. Depending on your setup, you may be able to prop the lid up, rest it against something nearby, or you may need to hold it the whole time. Every unit is a little different.
Step 3 — Vacuum out the pan
Before you spray anything, get the shop vac and clean out the bottom pan of the unit. Leaves, debris, dead insects, whatever has fallen in — get it all out. While you’re down there, find the small drainage holes around the base of the pan and make sure they’re clear. If those get plugged, the unit can’t drain and you’ve got a bigger problem.
Step 4 — Apply the coil cleaner
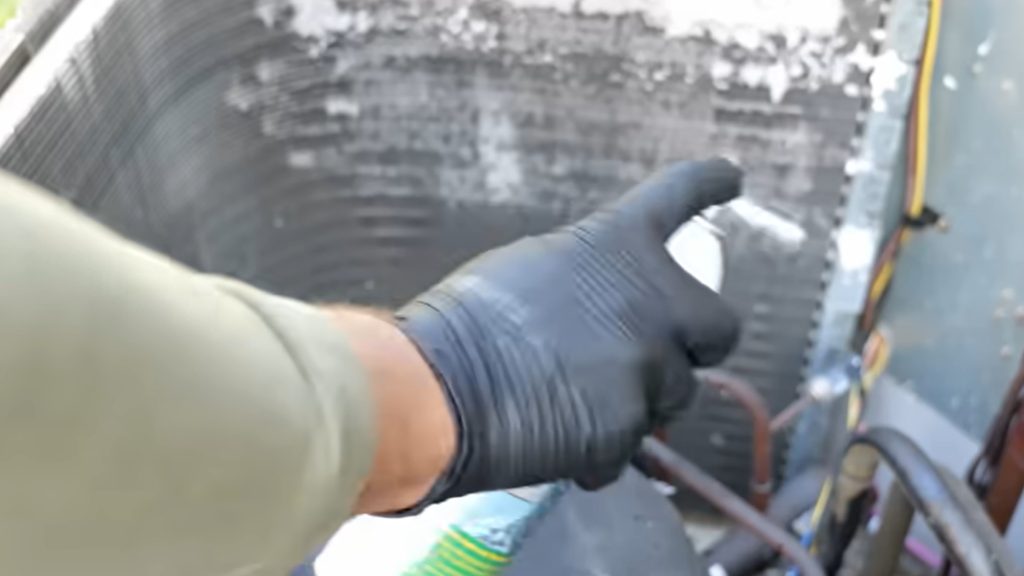
Put on your gloves and safety glasses before opening the can. As the cleaner hits the fins it can splash back — and you don’t want that in your eyes.
Spray the Frost King foam cleaner side to side, working top to bottom on one section at a time. Make sure you’re spraying at an angle that gets between the fins, not just on the surface. You want the cleaner reaching the actual coils behind the fins, not just coating the outside layer.
Work your way around all four sides from the inside. Then do a pass on the outside of each wall as well — especially if you have two rows of coils, because what doesn’t reach from the inside needs to be hit from the outside. One can is typically enough for a full inside-and-outside pass.
Let the cleaner sit for 5 to 8 minutes.
Step 5 — Rinse everything out
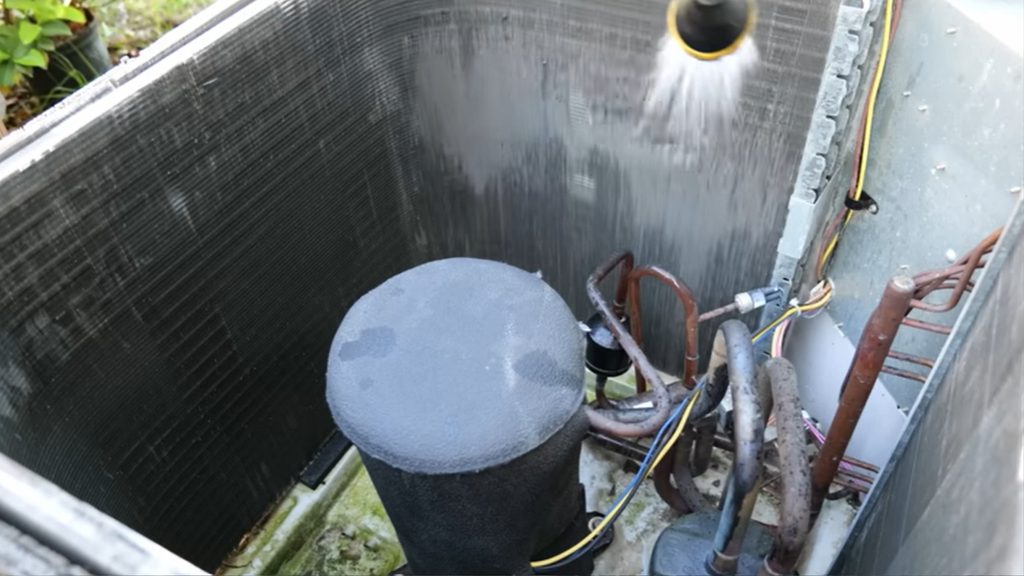
Set your garden hose nozzle to shower mode — high volume, low pressure. Starting from the inside, rinse the same way you sprayed: side to side, top to bottom, working around all four walls. You’ll see the grime washing out as you go. Rinse the outside walls the same way.
Never use a pressure washer. The fins are thin aluminum and high pressure will bend them permanently, restricting airflow and costing you a service call to straighten them.
Once the coils are rinsed, turn the pressure up slightly on the nozzle and flush out the pan at the bottom. This gets rid of the sudsy residue and gives the pan a good rinse at the same time.
Step 6 — Reassemble and restore power
Set the lid back down, making sure it overlaps evenly around all four walls. Hand-tighten all the screws back in — don’t use a drill. Stripped threads mean a loose lid, and a loose lid means debris gets back in faster.
Restore power in order: breaker first, then the exterior disconnect. Set your thermostat back to cool and listen to the unit start up. No grinding, no clanking — just the fan and the hum of a system that can finally breathe again.
Signs your condenser unit needs cleaning
You don’t have to wait until it looks visibly dirty — by then it’s already been affecting your bill. Watch for:
- Your home is taking longer than usual to cool down
- Energy bills are creeping up without an obvious reason
- The unit is short-cycling — turning on and off more frequently than normal
- You can see grass clippings, cottonwood, or debris matted on the fins
And keep in mind: even a unit that looks mostly clear through the fins can still be restricting airflow. If you haven’t cleaned it in over a year, it’s time.
When to call a professional
DIY cleaning covers everything you can reach safely — the fins, coils, and drain pan. Call an HVAC tech if:
- You see burnt wiring, oil residue, or damaged components inside the unit
- The system still struggles to cool after cleaning
- You suspect a refrigerant issue (ice on the lines, weak airflow from vents despite a clean unit)
- The fins are severely crushed across large sections
Annual professional maintenance — typically $100 to $300 — includes refrigerant checks, electrical inspection, and drain line service. Worth doing once a year even if you handle the condenser cleaning yourself.
Frequently Asked Questions About How to Clean AC Condenser Unit
How often should I clean my AC condenser unit?
Once a year is the standard recommendation for most homes — ideally in spring before cooling season starts. If your unit sits under a tree, near a cottonwood, or in an area with heavy pollen or grass clippings, check it every six months. You don’t have to wait until it looks dirty. A unit that appears clear through the fins can still have enough buildup on the inner coils to restrict airflow and raise your energy bill.
Can I clean my AC condenser unit myself?
Yes — the fins, coils, and drain pan are all accessible to a homeowner with basic tools. You’ll need work gloves, safety glasses, a shop vac, a can of foam coil cleaner, and a garden hose. The whole job takes about 30 minutes. The main things to get right are cutting power at the disconnect box before you start, using shower mode on the hose instead of jet, and never using a pressure washer on the fins.
Can I spray my AC unit with a garden hose?
Yes, but use shower mode — high volume, low pressure. Start from the inside and rinse side to side, top to bottom, then repeat on the outside. Never use a pressure washer. The condenser fins are thin aluminum and high pressure will bend them permanently, which restricts airflow and requires a service call to repair. A standard garden hose with a spray nozzle on shower or gentle setting is all you need.
Do I need to open the AC unit to clean it?
If your unit has two rows of coils, yes. Spraying the outside only cleans the outer row — the inner row stays dirty. The only way to reach it is to remove the lid with a nut driver, spray coil cleaner from the inside out, and rinse from the inside as well. Opening the lid also lets you vacuum out the drain pan at the bottom, which you can’t reach any other way.
When should I call a professional instead of cleaning it myself?
Call an HVAC tech if you see burnt wiring, oil residue, or physically damaged components inside the unit. Also call if the system still struggles to cool after a thorough cleaning, if you suspect a refrigerant issue (ice on the lines, weak airflow despite a clean unit), or if the fins are crushed across large sections. Annual professional maintenance — typically $100 to $300 — covers refrigerant checks and electrical inspection that DIY cleaning doesn’t address.