
Yardtally is reader-supported. Some links on this page are affiliate links. As an Amazon Associate, Yardtally earns from qualifying purchases. See our Affiliate Disclosure.
I laid a paver patio in my backyard and the most important thing I learned is that knowing how to lay pavers correctly from the start is what separates a patio that stays level for fifteen years from one that shifts, sinks, and grows weeds through the joints by year two. The pavers themselves are almost the easy part. It’s everything underneath them that determines whether the project holds up. This is the process I followed — and what anyone learning how to lay pavers should know before they start.
What’s in This Guide
- How to Lay Pavers: What You’ll Need
- Step 1 — Plan and Measure Your Patio
- Step 2 — Excavate and Prepare the Base
- Step 3 — Add and Compact the Gravel Base
- Step 4 — Add the Sand Bedding Layer
- Step 5 — Lay the Pavers
- Step 6 — Cut Pavers for Edges and Borders
- Step 7 — Compact the Pavers and Fill the Joints
- What I’d Do Differently
- Quick Summary
- FAQ
How to Lay Pavers: What You’ll Need
Before you buy pavers, figure out your exact square footage so you know how many to order. Our square footage calculator handles any shape — rectangle, circle, or L-shape. Once you have your area, use our paver calculator to get the exact paver count based on your paver size and joint spacing, with a waste allowance built in.
Beyond the pavers, here’s what you’ll need for a standard installation:
Tools
A rubber mallet for setting pavers without cracking them, a hand tamper compactor for compacting the base, a paver puller tool set for lifting and repositioning pavers without damaging them, a level, a tape measure, and string lines for keeping rows straight.
Materials
Crushed gravel for the base (4–6 inches deep), all-purpose sand for the 1-inch bedding layer, landscape fabric weed barrier to install under the gravel, Alliance Gator Polymeric Sand for the joints, and edge restraints to hold the perimeter in place.
Step 1: Plan and Measure Your Patio
Mark out your patio area with stakes and string lines before you dig anything. This is the step most people rush, and it shows. I took my time getting the corners square using the 3-4-5 triangle method — measure 3 feet along one string and 4 feet along the perpendicular string, and if the diagonal between those two points is exactly 5 feet, your corner is perfectly square. Do this at every corner.
Once your area is marked, calculate the total square footage. Use our square footage calculator if your patio is an irregular shape. Knowing your exact area is what determines how much gravel, sand, and pavers to order — guessing here costs money.
Step 2: Excavate and Prepare the Base
Excavate the patio area to a depth of 7–8 inches — 4–6 inches for the gravel base, 1 inch for the sand bedding layer, plus the thickness of your pavers (typically 2–2.5 inches for standard concrete pavers). The finished surface should sit just slightly above the surrounding grade to allow water to drain away from the patio rather than pooling on it.
Grade the base with a slight slope — about 1/8 inch per foot — away from your house or any structure. This is critical for drainage and one of the most common things DIYers skip. A flat or inward-sloping patio will collect water and accelerate settling.
Once excavated, lay landscape fabric weed barrier across the entire base before adding gravel. This is the step I almost skipped and I’m glad I didn’t — it blocks weed growth from the subsoil working up through the base over time.
Step 3: Add and Compact the Gravel Base
Add crushed gravel in 2-inch layers, compacting each layer with the hand tamper compactor before adding the next. Don’t dump all the gravel in at once and compact it — layered compaction is what creates a stable base that won’t settle unevenly under the weight of the pavers and foot traffic over time.
For larger patios, renting a plate compactor is worth every dollar. A hand tamper works for small areas but gets physically exhausting on anything over 100–150 square feet. The goal is a firm, immovable base that doesn’t shift when you press down on it.
Step 4: Add the Sand Bedding Layer
Spread 1 inch of all-purpose sand over the compacted gravel base. This is the setting bed — it gives you the ability to fine-tune the level of each individual paver before it’s locked in place by the surrounding pavers and polymeric sand.
Screed the sand flat using two parallel pipes or screed rails set at the correct height and a straight board dragged across them. Take your time here — an uneven sand bed produces an uneven patio surface. I used 1-inch diameter conduit pipes as screed rails and it worked perfectly.
Do not walk on the screeded sand bed after leveling it. Step on it and you’ll create a depression that’s hard to fix without re-screeding the whole section. Lay your first paver at the edge and work across the sand, kneeling on the pavers you’ve already set. Our sand calculator can tell you exactly how much sand to buy for your bedding layer based on your patio area and a 1-inch depth.
Step 5: Lay the Pavers
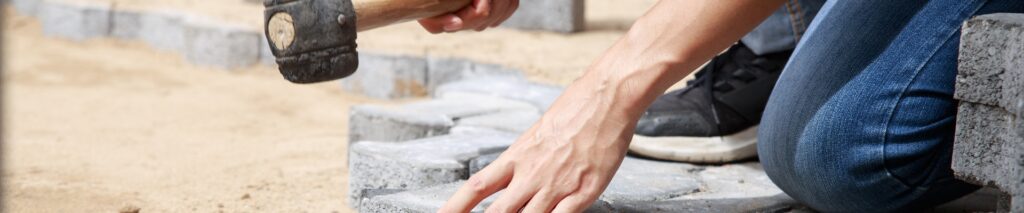
Start at a fixed edge — a wall, a straight border, or a corner — and work outward. Set each paver down gently without sliding it across the sand, which disturbs the bed. Once it’s positioned, tap it firmly into place with the rubber mallet until it’s level with the surrounding pavers.
Check your level frequently — every 4–5 pavers at minimum. Small errors compound quickly, and a paver that’s 1/8 inch high creates an annoying trip hazard once the patio is finished. If a paver sits too high, lift it with the paver puller tool set, remove a little sand, and reset it. If it’s too low, add a small amount of sand and reset.
Maintain consistent joint spacing as you go. I used small plastic spacers to keep the gaps uniform — it makes a noticeable difference in the finished look compared to eyeballing it.
Step 6: Cut Pavers for Edges and Borders
You’ll almost certainly need to cut pavers for the perimeter. A circular saw with a diamond blade works for occasional cuts; a wet saw or angle grinder with a diamond blade is faster and cleaner for larger quantities. Always wear eye protection and a dust mask when cutting concrete pavers — silica dust is a real hazard.
Mark cuts with a pencil or chalk line before cutting. Measure twice — cut pavers are unforgiving and wasted cuts add up fast. This is exactly why the 10% waste allowance in the paver calculator matters — plan for breakage and imperfect cuts from the start.
Step 7: Compact the Pavers and Fill the Joints
Once all pavers are set, run the plate compactor (or hand tamper for small patios) over the entire surface to settle the pavers firmly and evenly into the sand bed. Use a piece of plywood or a rubber pad between the compactor and the pavers to avoid surface damage.
After compacting, spread Alliance Gator Polymeric Sand over the entire surface and work it into the joints with a broom, sweeping in multiple directions until the joints are completely filled. Blow or sweep away any excess from the paver surfaces.
Compact the surface one more time to help seat the polymeric sand into the joints. Then lightly mist the entire patio with water — don’t soak it, just dampen it — to activate the binding agents in the polymeric sand. Keep foot traffic off the patio for 24 hours while it cures.
What I’d Do Differently
If I started over, I’d spend more time on the gravel base and less time worrying about the pavers themselves. I rushed the base compaction on one section and it showed within a year — two pavers in that area settled slightly and created a minor dip. It’s an easy fix but an annoying one.
I’d also order all my pavers from the same batch upfront. I had to order a second batch for the border and there was a subtle color difference that’s barely noticeable but still bugs me every time I look at it. Order more than you think you need from the start.
Quick Summary
Knowing how to lay pavers correctly is a project most homeowners can tackle in a weekend. Excavate 7–8 inches deep, lay landscape fabric, compact 4–6 inches of gravel in layers, screed 1 inch of sand flat, lay pavers from a fixed edge outward, check level constantly, cut borders, compact the finished surface, fill joints with polymeric sand, and activate with water. The base prep is 80% of the job — get that right and the rest follows.
Frequently Asked Questions About How to Lay Pavers
How deep should I excavate for a paver patio?
7 to 8 inches total: 4 to 6 inches of compacted gravel base, 1 inch
of sand bedding layer, plus the thickness of your pavers (typically
2 to 2.5 inches for standard concrete pavers). The finished surface
should sit just slightly above the surrounding grade so water drains
away from the patio rather than pooling on it. Grade the base with
a slight slope — about 1/8 inch per foot — away from your house or
any structure. This is one of the most commonly skipped steps and
one of the most important: a flat or inward-sloping patio will collect
water and accelerate settling over time.
Do I need to use polymeric sand between pavers?
Yes — for any outdoor paver installation, polymeric sand is worth the
premium over regular sand. Regular sand washes out with rain over time,
leaving gaps that allow weeds to germinate and ants to nest between the
joints. Polymeric sand contains binding agents that harden when moistened,
locking the joints and staying in place through rain and foot traffic.
It dramatically reduces weed growth and keeps pavers from shifting.
Apply it after the final compaction pass, work it into the joints with
a broom, compact once more, then lightly mist the entire surface to
activate the binding agents. Keep foot traffic off for 24 hours while
it cures.
Can I lay pavers on an existing concrete patio?
Yes — as long as the concrete is structurally sound (no major cracks,
heaving, or settling). Laying pavers over concrete eliminates the need
to excavate and build a gravel base, which significantly simplifies
the project. Use a thin-set mortar adhesive rather than a sand bedding
layer, set the pavers directly into the mortar, and use polymeric sand
for the joints. The finished surface will sit higher than it originally
did, so check that doors, thresholds, and drainage points can
accommodate the added height before committing to this approach.
How long does a paver patio last?
A properly installed paver patio — with adequate base compaction,
correct drainage slope, and polymeric sand joints — can last 25 to
50 years or longer. Individual pavers can be lifted and replaced if
they crack or settle without disturbing the rest of the patio, which
is a major advantage over concrete. The base preparation is what
determines longevity — a well-compacted gravel base that drains
properly will outlast any surface treatment. Skipping base layers
or using inadequate compaction produces a patio that starts shifting
within a few winters.
What is the most common paver installation mistake?
Skipping or rushing the gravel base compaction. This is the single
most common cause of paver patios that shift, sink, and become uneven
within a few years. The gravel base needs to be compacted in 2-inch
layers — not dumped in all at once and tamped once at the end. Each
layer needs firm, uniform compaction before the next goes on top.
For patios larger than 150 square feet, renting a plate compactor
rather than using a hand tamper is the difference between a base
that holds and one that settles unevenly. The pavers themselves are
almost the easy part — it’s everything underneath them that determines
whether the project holds up.