
Yardtally is reader-supported. Some links on this page are affiliate links. As an Amazon Associate, Yardtally earns from qualifying purchases. See our Affiliate Disclosure.
Does attic insulation help cool your house? Yes — significantly. But insulation is only part of the equation, and most guides stop short of telling you the part that matters as much: if your attic hatch is unsealed or your ventilation is inadequate, adding more insulation alone won’t solve the problem.
I went through this in my own home before tackling the attic, and the fix required doing three things in the right order. This guide covers all of them — what actually works, how much difference it makes, and where to start.
What’s in This Guide
- Does Attic Insulation Help Cool Your House? Here’s Why It Works
- How Much Does Attic Insulation Actually Help?
- What R-Value Do You Need?
- The Easiest Win First — Seal Your Attic Hatch
- Adding or Upgrading Attic Insulation
- Attic Ventilation — The Half of the Equation Most People Skip
- The Right Order of Operations
- What to Realistically Expect
- FAQ
Does Attic Insulation Help Cool Your House? Here’s Why It Works
On a summer day, attic temperatures can hit 130–150°F. That heat radiates down through your ceiling into your living space, making your AC work harder and your upstairs rooms feel stuffy no matter how low you set the thermostat. The attic is essentially a giant heat battery sitting on top of your house.
Three things control how much of that heat gets into your living space: insulation (slows heat transfer), ventilation (removes hot air before it builds up), and air sealing (stops conditioned air from escaping into the attic). All three matter. Most people only think about insulation.
If your upstairs rooms are consistently hotter than the rest of the house, our guide on why is your upstairs always hotter than downstairs covers the full picture including duct balancing and ceiling fan direction.
How Much Does Attic Insulation Actually Help?
According to the U.S. Department of Energy, properly insulating and air sealing your attic can reduce heating and cooling costs by 10–50% depending on your current insulation level and climate. That’s a wide range — but even at the low end, the savings are meaningful on a home that’s been running an undersized or overworked AC system all summer.
The key word is “properly.” Adding R-30 insulation on top of existing R-11 helps. But if your attic hatch is unsealed, if your recessed lights are open to the attic, or if your attic has no intake vents, the insulation can’t do its job fully. Source: ENERGY STAR — Seal and Insulate with ENERGY STAR
What R-Value Do You Need?
R-value measures how well insulation resists heat flow — higher is better. The DOE recommends these R-values for attic floors depending on your climate zone:
Climate Zone Recommendations
- Zone 1–2 (Deep South, Florida, Hawaii): R-30 to R-60
- Zone 3–4 (Mid-Atlantic, Southeast, Pacific Coast): R-38 to R-60
- Zone 5–6 (Midwest, Northeast, including Indiana): R-49 to R-60
- Zone 7 (Northern Plains, Alaska): R-49 to R-60
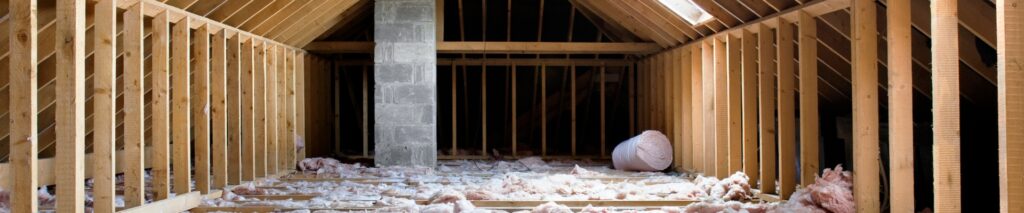
Most older homes in the Midwest were built with R-11 to R-19 in the attic — well below current recommendations. If you pull back your attic hatch and the insulation between the joists is only 3–4 inches deep, you’re significantly under-insulated.
The Easiest Win First — Seal Your Attic Hatch
Before adding a single inch of insulation, seal your attic hatch. An unsealed attic hatch is like leaving a window open between your conditioned living space and a 140°F oven. Conditioned air escapes up, hot air radiates down, and your AC runs constantly trying to compensate.
The best solution is an attic stairway insulator cover – a tent-style cover that fits over the hatch opening from the attic side and creates an insulated air barrier. Most install in under an hour with no tools. If you have a basic pull-down attic door rather than a full stairway, pair it with Frost King EPDM weatherstripping around the door frame to seal the gap before adding the cover.
Adding or Upgrading Attic Insulation
Blown-In Insulation (Most Common and Most Effective)
Blown-in cellulose or fiberglass is the most cost-effective way to bring an under-insulated attic up to current R-value recommendations. It fills gaps and irregular spaces better than batts and is faster to install over existing insulation. Home Depot and Lowes both offer free blower machine rental when you buy a minimum number of bags — typically around 10 bags. This is a legitimate DIY project for most homeowners.
Fiberglass Batt Insulation
Batt insulation works well for attics where the joists are exposed and you’re starting from scratch or doing a partial upgrade. R-30 and R-38 batts are standard sizes for attic floors. Buy at your local home center — batt insulation ships poorly and is almost always cheaper locally than on Amazon.
Radiant Barrier
A reflective radiant barrier foil stapled to the underside of your roof rafters reflects radiant heat before it ever reaches your insulation. It’s most effective in hot climates and on homes where the AC runs constantly in summer. It doesn’t replace insulation — it works alongside it. In a climate like Indiana’s, radiant barrier gives you the biggest payoff during July and August when attic temps peak.
Attic Ventilation — The Half of the Equation Most People Skip
Insulation slows heat transfer. Ventilation removes the heat before it builds up. You need both. A properly ventilated attic should have 1 square foot of vent area for every 150 square feet of attic floor space, split evenly between intake (soffit vents at the eaves) and exhaust (ridge vent or gable vents at the peak).
Signs Your Attic Is Under-Ventilated
- Attic feels like a sauna even in early morning
- Ice dams forming at the eaves in winter
- Shingles aging faster than expected
- Upstairs rooms that never cool down even with AC running
Powered Attic Ventilator
If your attic has adequate passive vents but still overheats, a powered attic ventilator exhaust fan actively pulls hot air out of the attic and forces cooler outside air in through the soffit vents. These are wired to a thermostat that activates the fan when attic temps hit a set threshold — typically 100–110°F. Installation requires basic electrical work — running a wire to the nearest junction box — which is within reach for a confident DIYer.
One important note: a powered attic fan only works correctly if your attic has adequate soffit intake vents. If the attic is too tightly sealed, the fan will pull conditioned air from your living space up into the attic instead of drawing outside air — which is the opposite of what you want. Check your soffit vents before installing a powered fan.
The Right Order of Operations
If you want to actually cool your house down this summer, tackle these in order — each one builds on the last:
- Seal the attic hatch — biggest bang for your buck, takes an hour
- Air seal penetrations — seal around recessed lights, plumbing stacks, and any gaps where wires or pipes enter the attic from below. Use fire-rated caulk or expanding foam.
- Check ventilation — confirm you have working soffit intake vents and at least one exhaust point (ridge vent, gable vent, or powered fan)
- Add insulation — bring your R-value up to DOE recommendations for your zone
- Consider radiant barrier — especially if you’re in a hot climate or your AC runs constantly in summer
We cover the full sequence in our guide on how to cool down a hot house, including how each step builds on the last
What to Realistically Expect
After sealing my attic hatch and adding insulation to bring the R-value up to R-49, the upstairs of my house became noticeably more comfortable within a day or two. The AC still runs — Indiana summers are brutal — but it doesn’t run as long or as often. My energy bills dropped noticeably the following month.
The honest expectation: attic insulation and air sealing won’t eliminate the need for air conditioning, but they will make your AC more effective and your upstairs rooms more livable. In an older home with minimal insulation, the difference can be dramatic.
Frequently Asked Questions About Attic Insulation and Cooling
How much can attic insulation reduce my energy bills?
According to the U.S. Department of Energy and ENERGY STAR, properly
insulating and air sealing your attic can reduce heating and cooling costs
by 10 to 50 percent depending on your current insulation level and climate.
The wide range reflects how much variation exists between homes — a home
with virtually no attic insulation sees dramatic improvement, while one
already at R-30 sees less. In the Midwest, where summers push AC systems
hard, homeowners upgrading from R-11 to R-49 commonly report noticeable
drops in monthly energy bills within the first cooling season.
What is the best R-value for attic insulation in Indiana?
Indiana falls in Climate Zone 5, and the Department of Energy recommends
R-49 to R-60 for attic floors in that zone. Most older Indiana homes were
built with R-11 to R-19 — significantly below current recommendations.
If you pull back your attic hatch and the insulation between the joists
is only 3 to 4 inches deep, you’re in that under-insulated range. Blown-in
cellulose or fiberglass is the most practical way to bring an existing
attic up to R-49 without removing what’s already there.
Should I insulate my attic floor or the roof line?
For most homes, insulate the attic floor — the surface between the
attic and your living space. This keeps conditioned air in your living
space and lets the attic itself vent freely to the outside. Insulating
the roof line (the underside of the rafters) creates a conditioned attic
space, which is appropriate only if your HVAC equipment or ductwork runs
through the attic — in that case, you want the attic to be within the
conditioned envelope. For most homes where ductwork runs inside the living
space and the attic is used for storage only, floor insulation is the
right approach.
Does attic insulation help in summer or just winter?
Both — but the mechanism is different. In winter, insulation keeps heat
inside your living space from escaping upward into the cold attic. In
summer, it slows radiant heat from the 130 to 150°F attic from radiating
downward into your living space. The same R-value does both jobs. Summer
performance is often more dramatic for homeowners who upgrade — the
reduction in attic radiant heat load makes the upstairs noticeably more
comfortable and reduces AC runtime significantly in the weeks after the
upgrade is complete.
Is sealing the attic hatch really that important?
Yes — it’s the highest-return single action most homeowners can take.
An unsealed attic hatch is a direct hole between your conditioned living
space and a 140°F oven in summer. Conditioned air escapes up and hot air
radiates down continuously. An attic stairway insulator cover — a tent-style
insulated barrier that fits over the hatch opening — costs $30 to $80
and installs in under an hour with no tools. Most homeowners report
an immediate difference in how the upstairs feels after sealing the hatch,
before any additional insulation is added. Do this first, before spending
money on anything else.