

Yardtally is reader-supported. Some links on this page are affiliate links. As an Amazon Associate, Yardtally earns from qualifying purchases. See our Affiliate Disclosure.
If you’re trying to figure out how to dethatch a lawn, you’re probably already seeing the signs — a dull, spongy lawn that sheds water instead of absorbing it. I looked into this carefully before tackling it on my own lawn, and what I found is that most homeowners either dethatch too aggressively, too early, or skip it entirely because they’re not sure what they’re looking for. This guide covers how to know if you actually need to dethatch, when to do it, and the best method based on your lawn size.
What’s in This Guide
- What Is Thatch, and Why Does It Matter?
- How to Tell if Your Lawn Has a Thatch Problem
- When to Dethatch a Lawn
- How to Dethatch a Lawn — Two Methods
- What to Do After Dethatching
- How Often Should You Dethatch?
- Quick Summary
- FAQ
What Is Thatch, and Why Does It Matter?
Thatch is the layer of dead and living organic matter — grass stems, roots, and debris — that builds up between the soil surface and the green blades of grass above it. A thin layer of thatch (under half an inch) is actually beneficial. It acts as a mild insulator, helps retain moisture, and cushions the soil surface.
The problem starts when thatch accumulates faster than it breaks down. Once it exceeds about half an inch, it starts blocking water, air, and nutrients from reaching the root zone. Fertilizer sits on top of the thatch instead of penetrating the soil. Roots start growing into the thatch layer itself rather than the soil below, which makes them more vulnerable to heat and drought stress. Over time, a thick thatch layer can turn a healthy lawn into one that looks perpetually struggling no matter how much you water or fertilize. Source: Purdue Extension — Mowing, Thatching, Aerifying and Rolling Turf
How to Tell if Your Lawn Has a Thatch Problem
The simplest way is to pull a small plug of turf from your lawn — a hand trowel works fine. Look at the cross-section. The thatch layer sits between the green grass above and the dark soil below. If it’s less than half an inch thick, you’re fine. If it’s between half an inch and an inch, dethatching would benefit the lawn. If it’s over an inch, you have a significant problem that needs addressing before it does more damage.
Other signs of excessive thatch: the lawn feels soft and spongy when you walk on it, water puddles on the surface instead of soaking in, the grass looks thin and yellowish despite adequate watering, or you can see a distinct brownish layer between the soil and the green grass when you look at the lawn from the side.
When to Dethatch a Lawn
Timing matters more than most people realize. You want to dethatch when the grass is actively growing and can recover quickly — not when it’s stressed, dormant, or headed into a tough season.
The best times to dethatch are during the early spring or early fall, depending on the type of grass you have. During these periods, the grass is more resilient and can bounce back from the disruption. Additionally, ensure that the soil is moist before you start the dethatching process to minimize stress on the grass. After dethatching, it’s crucial to follow up with proper lawn care, including aeration and fertilization, to encourage healthy regrowth. Monitoring the thatch layer regularly will help maintain a vibrant and resilient lawn.
Cool-Season Grasses (Kentucky Bluegrass, Fescue, Ryegrass)
Dethatch in early fall — late August through September. The grass is coming out of summer stress and entering its strongest growth period of the year. Avoid spring dethatching for cool-season lawns; the lawn is still vulnerable from winter and you risk introducing weeds into the disturbed soil.
Warm-Season Grasses (Bermuda, Zoysia, St. Augustine, Centipede)
Dethatch in late spring through early summer — once the grass has fully greened up and is growing vigorously. Warm-season grasses recover quickly during this window. Avoid dethatching in fall when these grasses are heading toward dormancy.
How to Dethatch a Lawn — Two Methods
Method 1: Dethatching Rake (Small to Medium Lawns)
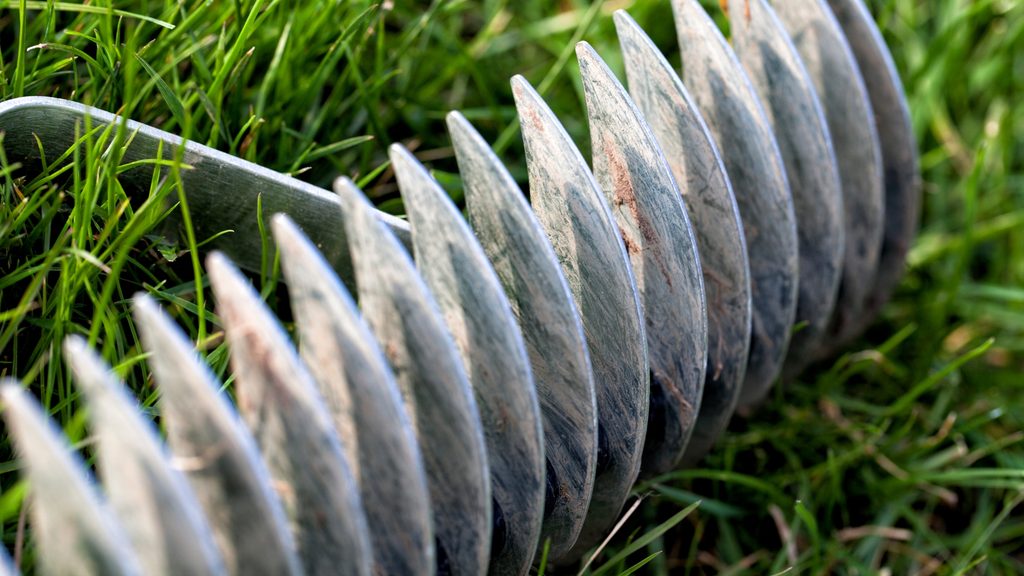
A dethatching rake is the manual option and works well for lawns under 2,000–3,000 square feet or for spot-treating a problem area. It has sharp, curved tines designed to dig into the thatch layer and pull it up as you rake. It’s more physical work than a standard rake but far less expensive than renting or buying a power dethatcher.
To use it: rake in overlapping rows across the lawn, applying firm downward pressure so the tines reach the thatch layer. You’ll pull up a surprising amount of material — rake it into piles and bag or compost it as you go.
Method 2: Electric Dethatcher / Power Rake (Medium to Large Lawns)
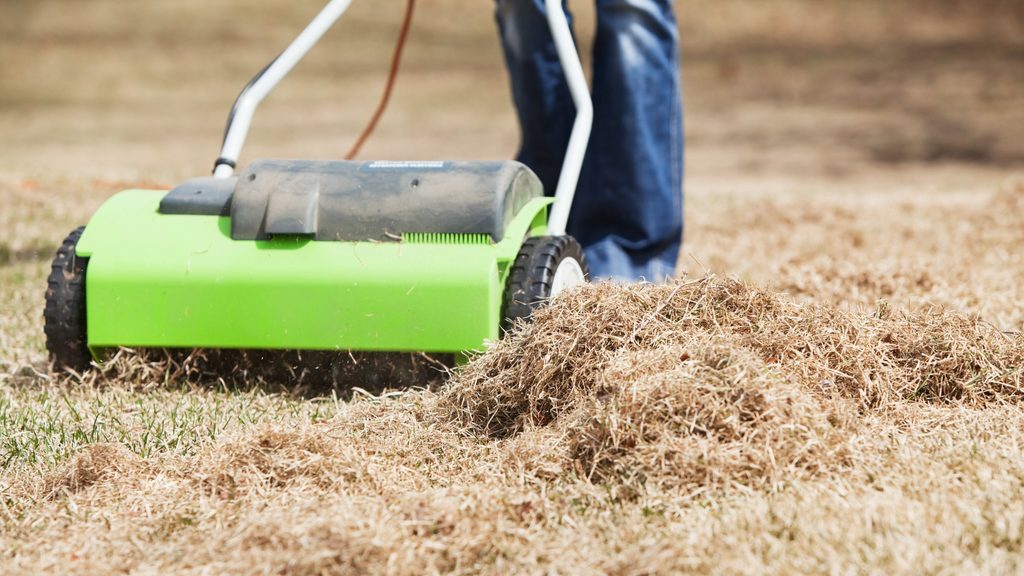
For larger lawns or heavy thatch buildup, a power dethatcher makes the job significantly faster and more thorough. The WEN DT1516 Electric Dethatcher is the one I’d recommend after researching the options — 4.5 stars across 1,400+ reviews, an Amazon Overall Pick, and a 2-in-1 design that handles both dethatching and scarifying. The collection bag means less cleanup as you go, which is a genuine time-saver on a big lawn.
Set the cutting depth so the tines just reach the thatch layer without digging into the soil. Make overlapping passes in one direction, then make a second pass perpendicular to the first for thorough coverage. Expect to pull up a lot of material — this is normal and means it’s working.
What to Do After Dethatching
Dethatching leaves the lawn looking rough and stressed — that’s temporary and expected. Here’s what to do immediately after:
1. Remove the debris
Rake up and remove all the pulled thatch. Don’t leave it on the lawn — it will just re-mat down and partially undo the work you did. Bag it for trash pickup or add it to a compost pile if it’s free of disease.
2. Aerate if needed
Dethatching and aeration are complementary but separate steps. If your soil is also compacted — which often goes hand in hand with thatch problems — this is the ideal time to aerate. The two processes together give your lawn the best possible chance to recover and thrive. For small areas, a spike aerator is a simple hand tool that gets the job done; for larger lawns, a core aerator pulls actual plugs from the soil and is more effective for serious compaction. Or rent a walk-behind core aerator for large lawns.
3. Overseed bare or thin areas
Dethatching often exposes bare patches where the grass was struggling. This is an ideal time to overseed — the soil surface is disturbed and receptive to seed, and if you’re timing this correctly (fall for cool-season, late spring for warm-season), germination conditions are good. If you need help figuring out how much seed to buy, our grass seed calculator can give you an exact amount based on your square footage.
4. Fertilize
Apply a starter fertilizer after dethatching and overseeding to support root development and recovery. This is one of the highest-return applications you can make — the lawn is primed to absorb nutrients after dethatching opens up the soil surface.
5. Water consistently
Keep the lawn consistently moist for the first two to three weeks after dethatching, especially if you’ve overseeded. The disturbed root zone is more susceptible to drought stress during recovery.
How Often Should You Dethatch?
Most lawns don’t need annual dethatching. Check your thatch depth once a year by pulling a small plug — if it’s under half an inch, leave it alone. Lawns that build thatch quickly (Bermuda and Kentucky Bluegrass are the most prone) may need dethatching every one to two years. Other grass types may go three to five years between treatments.
Over-dethatching is a real problem. Running a power rake over a lawn that doesn’t need it causes unnecessary stress and can damage healthy root systems. Check first, then decide.
Quick Summary
Thatch is the layer of organic debris between the soil and grass blades. A thin layer is fine; anything over half an inch starts causing problems. Check your thatch depth before deciding to dethatch — pull a small plug and measure. Time dethatching with active grass growth: fall for cool-season grasses, late spring for warm-season. Use a dethatching rake for small areas or an electric dethatcher for larger lawns. After dethatching, remove debris, aerate if the soil is compacted, overseed thin areas, fertilize, and water consistently. Most lawns need dethatching every one to three years at most — check before you treat.
Frequently Asked Questions About How to Dethatch a Lawn
How do I know if my lawn needs dethatching?
Pull a small plug of turf with a hand trowel and look at the cross-
section. The thatch layer sits between the green grass above and
the dark soil below. If it’s under half an inch — roughly the
thickness of a pencil — the lawn is fine. Half an inch to an inch
means dethatching would benefit the lawn. Over an inch is a
significant problem. Other indicators: the lawn feels soft and
spongy underfoot, water puddles on the surface after rain instead
of soaking in, or you can see a distinct brownish layer when you
look at the lawn from the side. Check annually — treat when needed,
not on a fixed schedule.
Is dethatching the same as aerating?
No — they address different problems and work best together. Dethatching
removes the accumulated organic debris layer (dead stems, roots, and
debris) between the soil and the green grass. Aeration relieves soil
compaction by pulling plugs out of the ground, opening channels for
air, water, and nutrients to reach the root zone. Thatch buildup
and soil compaction often occur together, which is why dethatching
and aerating in the same session — dethatch first, then aerate —
gives the lawn the best possible recovery conditions. They’re
complementary, not interchangeable.
What happens if you dethatch at the wrong time?
Dethatching at the wrong time adds significant stress to grass that
can’t recover quickly. For cool-season grasses, dethatching in
summer heat means the lawn is already under stress from high
temperatures and the additional physical disruption can cause serious
damage. Spring dethatching on cool-season lawns stresses grass that’s
still recovering from winter and opens the soil surface to weed
germination at exactly the moment weed seeds are most active. The
right windows are fall for cool-season grasses (late August through
September) and late spring for warm-season grasses. Outside those
windows, the recovery is slower and the risk of damage higher.
Should I water before or after dethatching?
Water the lawn one to two days before dethatching so the soil is
moist but not wet. Dry, hard soil makes the dethatcher tines work
harder and produces less effective results — the tines can’t reach
the thatch layer as cleanly. Soil that’s too wet clumps and tears
rather than releasing thatch cleanly. After dethatching, water
consistently for the first two to three weeks to support recovery,
especially if you’ve also overseeded. The disturbed root zone is more
susceptible to drought stress during the recovery period.
How much thatch removal is too much?
If you’re pulling up green grass along with the thatch, you’ve set
the cutting depth too aggressive. The tines should reach the thatch
layer — the brownish mat between the green grass and the soil —
without digging into the soil itself. Power dethatchers with adjustable
depth settings should be tested on a small area first; start shallow
and go deeper only if needed. For lawns with less than half an inch
of thatch, any dethatching at all may be too aggressive — check the
depth before committing to a full treatment. Over-dethatching causes
unnecessary stress and can damage healthy root systems.