
Yardtally is reader-supported. Some links on this page are affiliate links. As an Amazon Associate, Yardtally earns from qualifying purchases. See our Affiliate Disclosure.
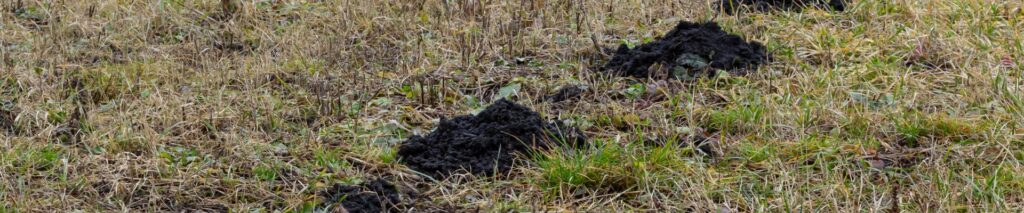
If you’ve walked across your lawn and felt the ground shift under your foot — or looked out to find a maze of raised ridges cutting across your grass overnight — moles have moved in. I dealt with this in my own yard and looked into every removal method available before deciding what to actually use.
What I found is that most homeowners reach for the wrong solution first (poison bait) and skip the step that matters most after (repairing the tunnel damage before the grass dies). This guide covers both: how to remove moles effectively and how to put your lawn back together once they’re gone.
What’s in This Guide
What Moles Are Actually Doing in Your Yard
Why You Should Skip Poison Bait
How to Get Rid of Moles in Your Yard: The Two Methods That Work
How to Fix Mole Damage in Your Lawn
When to Call a Professional
Quick Summary
Frequently Asked Questions
What Moles Are Actually Doing in Your Yard
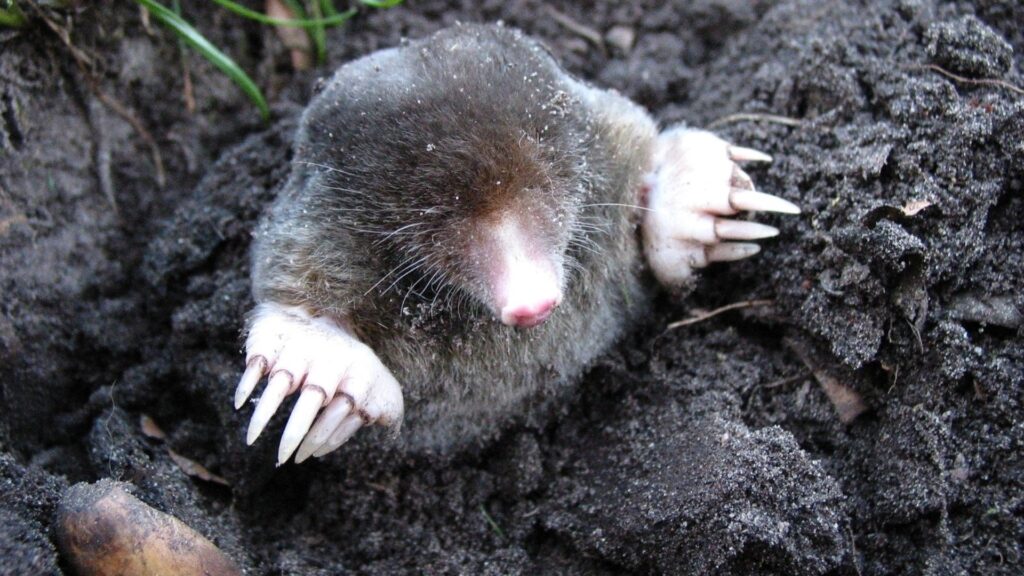
Moles aren’t eating your grass roots. That’s a common misconception worth clearing up early, because it affects how you approach the problem. Moles are insectivores — they’re tunneling through your soil in search of earthworms, grubs, and other soil-dwelling insects. Your lawn is attractive to them because healthy, well-watered soil has a dense population of exactly what they eat.
The damage they cause is indirect. Their tunneling network — both the shallow surface runs and the deeper main tunnels — disrupts the root contact between your grass and the soil. The raised ridges dry out quickly, and the roots along those channels lose their anchor. Left alone long enough, you’ll have visible dead lines tracing every tunnel path. Source: University of Missouri Extension — Moles
One important note: if you also have grubs, treating the grub population can reduce mole activity over time since you’re removing part of their food source. But grub treatment alone won’t eliminate moles — they’ll continue hunting earthworms regardless. Don’t let anyone sell you grub killer as a mole solution.
Why You Should Skip Poison Bait
Poison mole bait — usually shaped like fake earthworms or grubs — is widely available and marketed as an easy fix. I’d steer clear of it, and here’s why.
The most common active ingredient is bromethalin, a neurotoxin. It works, but the risks extend well beyond the mole. Pets and children who dig in treated areas can encounter the bait directly. More significantly, raptors — owls, hawks, and eagles — that catch and eat a poisoned mole can suffer secondary poisoning from the toxin still present in the carcass. This is the same secondary poisoning problem documented with rat poison, and it’s a real and documented threat to birds of prey. For a backyard problem, the collateral risk isn’t worth it when effective, targeted alternatives exist.
How to Get Rid of Moles in Your Yard: The Two Methods That Work
Method 1: Trapping (Most Effective)
Trapping is the most reliable way to remove moles — and after researching the options thoroughly, the Wire Tek 1001 EasySet Mole Eliminator Trap is the one I’d recommend. It has over 8,700 reviews, a 4.2-star rating, and consistently strong sales volume — which tells you real homeowners are buying it repeatedly and getting results. It’s also designed to be set without digging into the tunnel, which makes placement easier and less disruptive.
Here’s how to trap effectively:
Step 1: Find an Active Tunnel
Not every tunnel you see is actively in use. To find a live run, flatten a short section of a raised surface tunnel by pressing it down with your foot. Check it 24 hours later. If it’s been pushed back up, that’s an active tunnel — set your trap there. If it’s still flat, move on and test another one.
Step 2: Set the Trap Correctly
Follow the trap’s instructions for placement — the Wire Tek model straddles the tunnel rather than requiring you to dig into it. Place it on an active run, set the trigger, and mark the location with a small flag or stick so you can find it easily. Check traps every 24 hours.
Step 3: Be Persistent
A single mole can create a surprisingly large tunnel network — what looks like a yard full of moles is often one or two individuals. Most homeowners catch the culprit within the first few days of setting traps on confirmed active runs. If you’re not catching anything after five days, relocate the trap to a different active tunnel.
Method 2: Repellent (Best for Prevention and Borders)
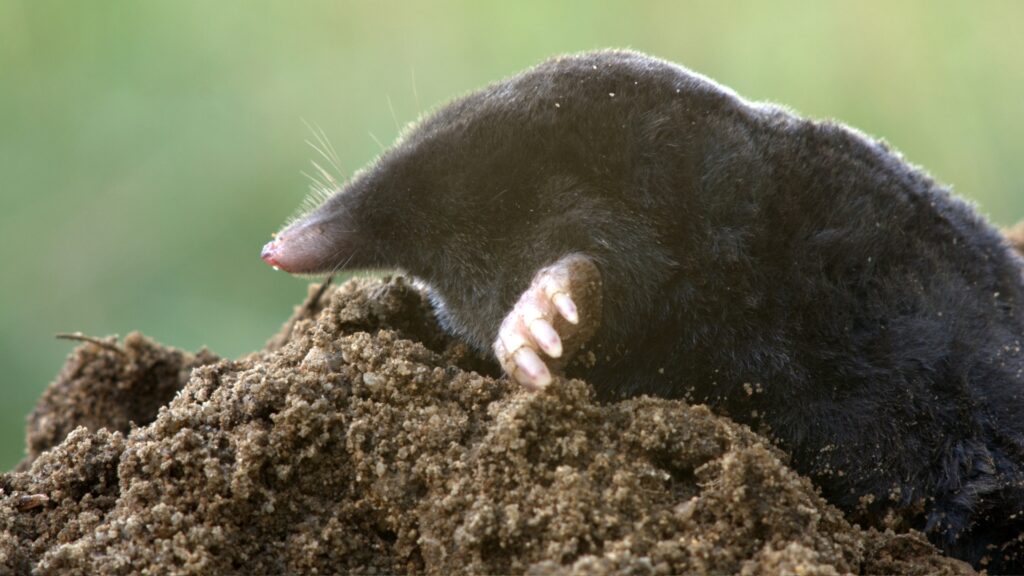
Castor oil-based repellents don’t kill moles — they make the soil and the insects in it taste and smell unpleasant enough that moles move on. They’re not as reliably effective as trapping for an active infestation, but they work well as a follow-up treatment after trapping to discourage moles from returning, or as a preventive barrier around garden beds and high-priority lawn areas.
The Natural Elements Mole and Vole Repellent uses a 100% castor oil formula and is safe for pets, kids, and wildlife once it’s watered in — which addresses the main concern with poison bait entirely.
Apply it according to the label, water it in thoroughly, and reapply after heavy rain. Use it around the perimeter of areas you want to protect, or across the full lawn after you’ve trapped out the active population.
How to Fix Mole Damage in Your Lawn
Removing the moles is only half the job. The tunnel network they leave behind needs to be addressed or you’ll be looking at dead lines and sunken tracks through the growing season.
Step 1: Press Tunnels Back Down
Start by walking the lawn and pressing all visible surface tunnels back down by hand or underfoot. Then go over the affected area with a water-fillable lawn roller to firm the soil back into contact with the grass roots. This is the most important step — roots that have lost soil contact will die if you leave the tunnels raised.
Step 2: Let the Grass Recover — or Reseed
Once the tunnels are pressed down and the roots are back in contact with soil, give the grass two to three weeks to recover. In many cases, the grass will green back up on its own once root contact is restored and you resume regular watering.
For sections where the grass is visibly dead — brown, dry, and not recovering — you’ll need to reseed. Loosen the surface with a garden rake, spread grass seed appropriate for your lawn type, and keep the area consistently moist until germination. If you want to speed things up, pre-germinating your grass seed can cut germination time nearly in half before you even spread it. If you need help figuring out how much seed to buy, our grass seed calculator can give you an exact amount based on your square footage.
Step 3: Address Any Deeper Depressions
Mole main tunnels run deeper than surface runs and can leave soft spots or slight depressions in the lawn after the tunnels collapse. If you notice low spots after rolling, fill them with a thin layer of lawn leveling mix and work it into the grass with the back of a rake. Don’t pile it on — a quarter inch at a time is the right approach to avoid smothering the grass.
When to Call a Professional
For most homeowners with a small to moderate mole problem, trapping is entirely manageable as a DIY project. A professional pest control service makes more sense when the infestation is severe, spans a very large property, or keeps returning despite consistent trapping efforts — which can indicate a much larger underground network or a yard with an unusually dense food source.
Quick Summary
Moles are after earthworms and grubs — not your grass roots — but their tunneling destroys root contact and kills grass along every run. Skip poison bait: it poses real risks to pets, children, and raptors through secondary poisoning. Trapping is the most effective removal method; find active tunnels first, set your trap on a confirmed live run, and check daily. Follow up with castor oil repellent to discourage return. For the damage, press tunnels back down with a lawn roller, give the grass time to recover, and reseed any sections that don’t bounce back within a few weeks.
Frequently Asked Questions About Getting Rid of Moles in Your Yard
What is the most effective way to get rid of moles?
Trapping is the most reliable method — more effective than repellents
and safer than poison bait. Find an active tunnel by pressing a short
section of a raised surface run flat with your foot, then checking it
24 hours later. If it’s been pushed back up, it’s active. Set the trap
on a confirmed active run, check it every 24 hours, and relocate if
you haven’t caught anything after five days. What looks like a yard full
of moles is often one or two individuals — most homeowners catch the
culprit within the first few days of setting traps correctly on active
runs.
Do moles eat grass roots?
No — this is one of the most common mole misconceptions. Moles are
insectivores, not herbivores. They’re tunneling through your soil in
search of earthworms, grubs, and other soil-dwelling insects. Your lawn
is attractive to them because healthy, well-watered soil has a dense
population of exactly what they eat. The damage they cause is indirect —
their tunneling network disrupts the root contact between grass and soil,
and the raised ridges dry out quickly, killing the grass along those
channels. Treating for grubs can reduce mole activity over time, but
it won’t eliminate them — they’ll keep hunting earthworms regardless.
Is poison mole bait safe to use?
No — and I’d steer clear of it entirely. The most common active ingredient
is bromethalin, a neurotoxin. Beyond the direct risk to pets and children
who might dig in treated areas, raptors — owls, hawks, and eagles — that
catch and eat a poisoned mole can suffer secondary poisoning from the
toxin still in the carcass. This is the same secondary poisoning problem
documented with rat poison, and it’s a real and documented threat to birds
of prey. Trapping and castor oil repellent are both effective alternatives
without the collateral risk.
How do I fix my lawn after moles leave?
Start by walking the lawn and pressing all visible surface tunnels back
down by hand or underfoot, then go over the affected area with a lawn
roller to firm the soil back into contact with the grass roots — this
is the most important step. Give the grass two to three weeks to recover.
In many cases it greens back up once root contact is restored and regular
watering resumes. For sections that don’t recover — brown, dry, and not
improving — loosen the surface with a rake, spread matched grass seed,
and keep consistently moist until germination. Address any remaining
soft spots or depressions with a thin layer of lawn leveling mix.
Will moles come back after I remove them?
Possibly — your yard remains attractive to other moles as long as it
has a healthy earthworm and grub population, which is a sign of good soil
health, not something you’d want to eliminate. Castor oil-based repellent
applied after trapping discourages new moles from establishing in the same
area by making the soil and its insects taste and smell unpleasant. Reapply
after heavy rain and use it as a perimeter treatment around high-priority
areas like garden beds. It won’t guarantee moles never return, but it
meaningfully reduces the likelihood of reinfestation in the areas you treat.