
Yardtally is reader-supported. Some links on this page are affiliate links. As an Amazon Associate, Yardtally earns from qualifying purchases. See our Affiliate Disclosure.
If you want to know how to plant hostas and actually have them thrive, the short version is this: find the shade, fix the soil, plant them at the right depth, and let them do their thing. Hostas are one of the most forgiving perennials you can grow — I’ve got them running along the north side of my house, under a mature oak, and in a shaded corner that nothing else would touch. Once they’re established, they come back bigger every year without much intervention from me.
This guide covers everything — where to plant them, when to plant, how deep to go, how to divide and multiply them for free, and what keeps them looking their best season after season.
What’s in This Guide
- Where to Plant Hostas
- When to Plant Hostas
- How to Prepare the Soil
- How to Plant Hostas Step by Step
- How to Water and Feed Hostas
- Mulching Hostas
- Dealing with Slugs and Snails
- How to Divide Hostas to Multiply Your Garden for Free
- Fall Care and Winter Prep
- What to Expect Year Over Year
- FAQ
Where to Plant Hostas
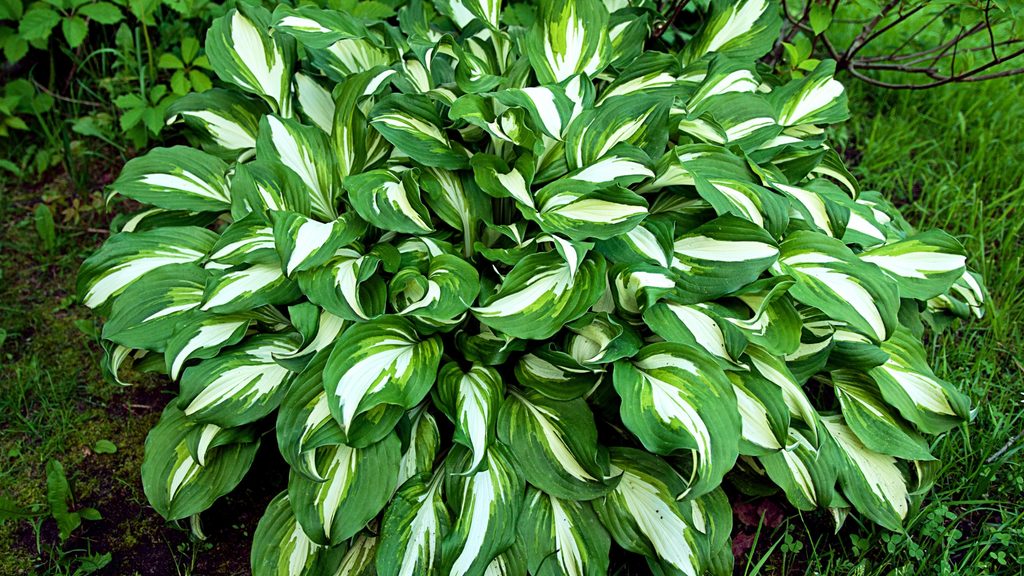
Hostas are shade plants, but “shade” covers a wider range than most people think. The best placement is morning sun with afternoon shade — a few hours of indirect or filtered light in the morning gives the foliage enough energy to develop color and texture, while protection from harsh afternoon sun prevents the leaf scorch that yellows the edges and bleaches out variegated varieties.
Full shade works fine too, especially for blue-leaved varieties like Halcyon or Blue Angel, which actually hold their color better without any direct sun. What hostas don’t tolerate well is afternoon sun — the intense heat of late-day sun in summer will damage most varieties, and some won’t recover fully before the season ends.
Placement ideas that work well in most yards: the north or east side of the house, under large shade trees, along a fence line that gets morning light, or in a shaded corner that gets indirect light all day. The areas where grass struggles are usually where hostas thrive.
One important note — hostas are toxic to dogs and cats. If you have pets that roam the yard freely, plant them in an area your animals don’t access, or consider a different perennial for heavily trafficked spots.
When to Plant Hostas
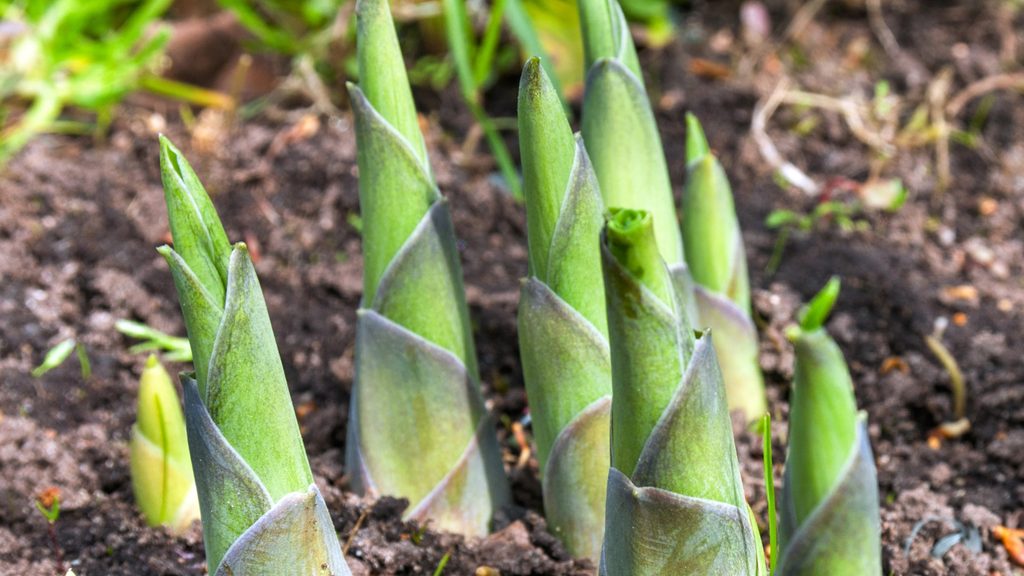
The two best planting windows are early spring and early fall. Spring planting — as soon as the ground is workable and the worst frost risk has passed — gives hostas the full growing season to establish before winter. Fall planting works well too, as long as you get them in the ground at least 30 days before your first expected frost so roots have time to settle before dormancy.
Avoid planting in midsummer heat if you can. A hosta planted in July is fighting heat stress and drought at the same time it’s trying to establish roots — possible, but it needs more attention and more consistent watering than a spring or fall plant would.
In central Indiana (Zone 6a), I aim for mid-April for spring planting and mid-September for fall planting. Check your last frost date and first frost date and work backward from there.
How to Prepare the Soil
Hostas prefer fertile, moist, well-draining soil with slightly acidic pH — around 6.0 to 6.5. The most common mistake is planting them in compacted soil under a tree without any amendment. The roots compete with the tree, the soil drains poorly, and the hosta struggles no matter how much shade it gets.
Before planting, loosen the soil to a depth of 12 to 15 inches and work in 2 to 3 inches of compost. This improves drainage in clay-heavy soil, adds the organic matter hostas prefer, and gives roots somewhere to go without fighting compaction. If you’re planting under a tree with aggressive surface roots, a raised bed or container may be a better option.
Hostas don’t like wet feet — soil that stays waterlogged after rain will rot the crown. If your planting spot drains slowly, amend heavily with compost and consider raising the planting area by a few inches to improve drainage.
How to Plant Hostas Step by Step
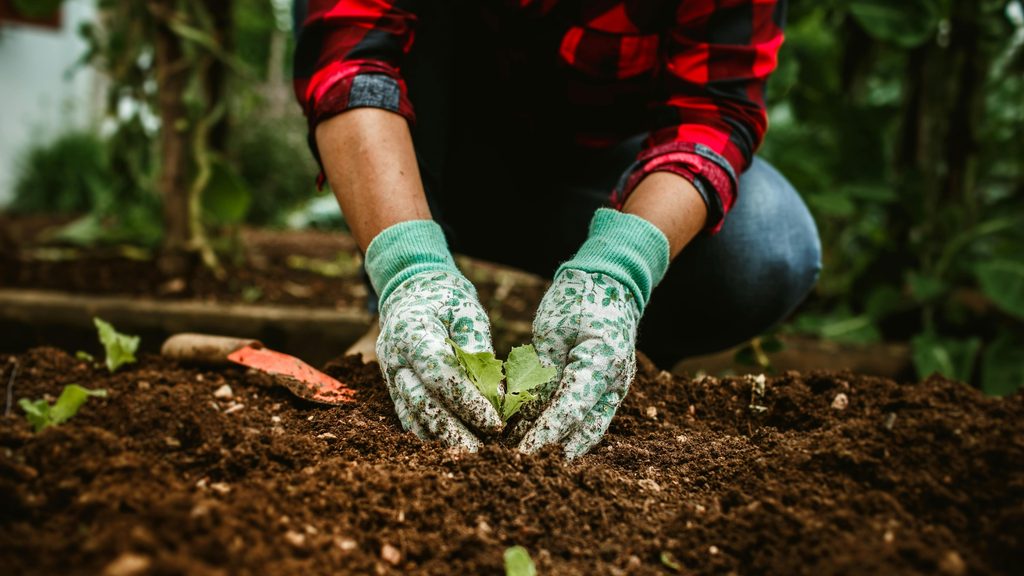
Once the soil is prepared, the actual planting is straightforward:
Dig a hole as deep as the root ball and roughly twice as wide. The extra width gives roots room to spread outward without resistance.
If you’re planting from a container, remove the plant and tease apart any circling roots so they spread naturally rather than continuing to grow in a circle. If the plant is root-bound, a few vertical cuts with a knife along the outer root ball opens it up.
Set the plant in the hole so the top of the root ball is level with the surrounding soil — not buried, not sitting high. Hostas planted too deep rot at the crown; planted too shallow, the crown dries out and the plant struggles to anchor.
Backfill with the amended soil, firm it gently around the base, and water thoroughly. Water slowly enough that it soaks in rather than running off — the goal is to settle the soil around the roots without creating air pockets.
Space hostas according to their mature width, not their current size. A small division or container plant will fill out significantly — most medium varieties reach 24 to 36 inches wide at maturity, and larger varieties like Sum and Substance can reach 4 to 5 feet across. Planting too close creates crowding problems in a few years that require earlier division.
How to Water and Feed Hostas
Newly planted hostas need consistent moisture for the first growing season while roots establish. Water whenever the top inch of soil feels dry — typically once or twice a week depending on heat and rainfall. Once established, hostas are more drought-tolerant, though they look their best with consistent moisture throughout the season.
A soil moisture meter takes the guesswork out of watering during the establishment phase — especially useful if you’re growing hostas in containers or in areas where soil moisture varies significantly.
Fertilize once in spring as new growth emerges and again in midsummer. A slow-release granular fertilizer worked into the soil around the base — not touching the crown — provides steady nutrition through the season without the surge-and-crash cycle of liquid fertilizers. Don’t fertilize after midsummer; late-season feeding pushes soft new growth that gets damaged by early frost.
Apply slow-release fertilizer once in spring when the shoots first emerge, scratching it lightly into the soil surface around the plant base.
Mulching Hostas
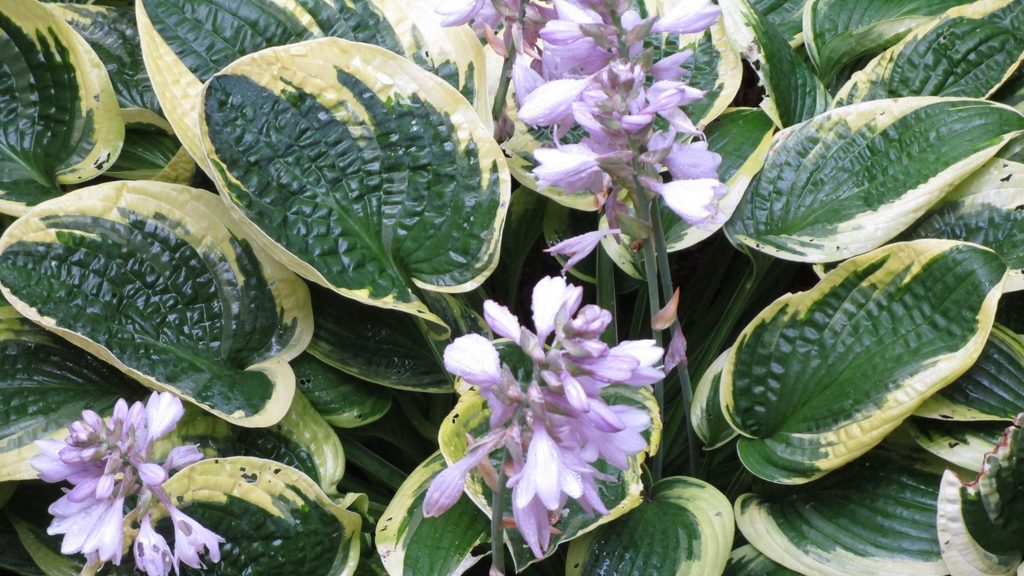
Mulch is one of the best things you can do for hostas. A 2 to 3 inch layer of organic mulch around the base — pulled back an inch or two from the crown — retains moisture, moderates soil temperature, suppresses weeds, and breaks down over time to improve soil structure.
Apply mulch in spring after the ground has warmed slightly and the new shoots have emerged. Mulching too early traps cold soil and can slow emergence. Refresh the mulch layer each fall after the foliage dies back to protect the crown through winter.
Organic mulch applied around hosta crowns in spring is one of the simplest ways to reduce watering frequency and keep foliage looking clean all season.
Dealing with Slugs and Snails
Slugs are the main pest problem with hostas — they chew ragged holes through the leaves, usually working at night or during wet weather. The damage is cosmetic but persistent, and a bad slug season can leave even well-established hostas looking tattered by midsummer.
The most effective control is slug and snail bait applied around the base of the plants in spring before damage starts. Reapply after heavy rain. Iron phosphate-based baits are pet-safe and break down naturally in the soil — a meaningful consideration if you have dogs or cats in the yard.
Slug and snail bait applied early in the season before damage starts is significantly more effective than treating after an infestation is visible.
How to Divide Hostas to Multiply Your Garden for Free
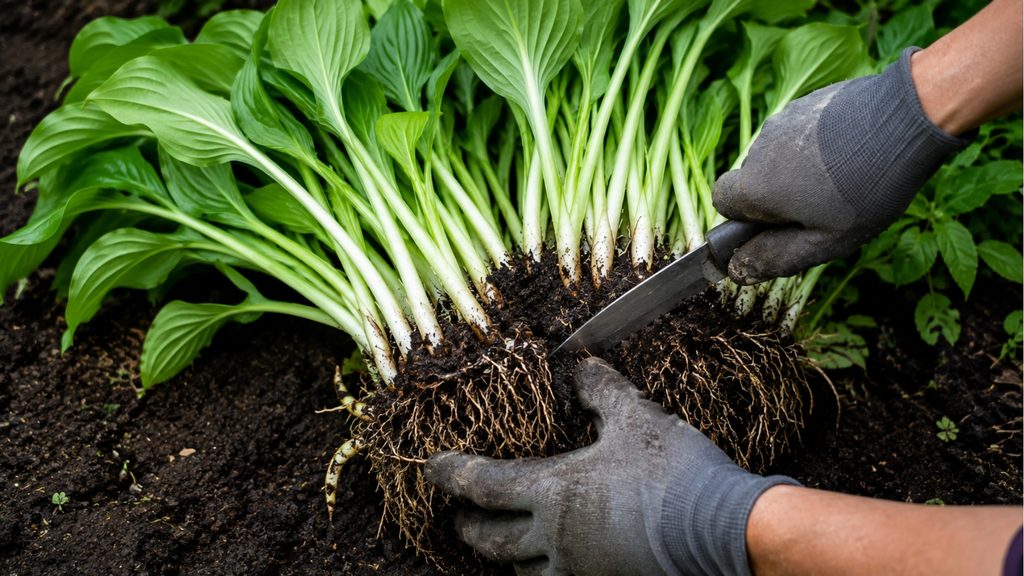
This is one of the best things about hostas — every established clump can be divided into multiple plants, and those divisions transplant easily. A single hosta you planted five years ago can become five or six plants without spending a dollar. I’ve used divisions to fill in shaded areas along our fence line that would have cost a few hundred dollars to plant from scratch.
When to Divide
The two best times to divide hostas are early spring — just as the shoots emerge from the ground — and early fall. Spring division is the most forgiving because the plant hasn’t invested energy in a full season of foliage yet. Fall division works well as long as you give the divisions time to establish before frost.
Hostas generally benefit from division every 3 to 5 years, or when the center of the clump starts to look crowded or produces noticeably smaller leaves than the outer portions.
How to Divide Step by Step
Water the plant thoroughly the day before dividing — moist soil makes the root ball easier to work with and reduces transplant stress on the divisions.
Use a garden fork to lift the entire clump from the ground. Work the fork in from multiple sides to loosen the root ball before lifting rather than forcing it straight up, which can damage roots.
Once the clump is out, shake or wash excess soil from the roots so you can see what you’re working with. A mature hosta clump can be surprisingly large — don’t be intimidated by the size.
Use a sharp knife or spade to cut the clump into sections, making sure each division has at least 2 to 3 shoots and a healthy portion of root. Smaller divisions with fewer shoots will establish fine — they just take an extra season to reach full size.
A garden fork is the right tool for lifting hosta clumps without breaking roots — the tines work between roots more cleanly than a spade.
Replant divisions immediately at the same depth they were growing. Water them in well and keep them consistently moist for the first two to three weeks while they reestablish. Don’t be alarmed if the divisions look rough for the first week — some wilting and leaf curl is normal as the plant redirects energy to root establishment.
Fall Care and Winter Prep
As temperatures drop in fall, hosta foliage will yellow and die back naturally. Let it happen — the plant is pulling energy back into the crown for winter storage. Once the foliage has fully died back after the first hard frost, cut it down to the ground and remove it. Leaving dead foliage in place over winter creates habitat for slugs and other pests that overwinter near the crown.
After cutting back, apply a fresh layer of mulch over the crown area to insulate it through winter. In Zone 6a, hostas are reliably cold-hardy without additional protection, but the mulch layer keeps freeze-thaw cycles from heaving the crown out of the ground.
What to Expect Year Over Year
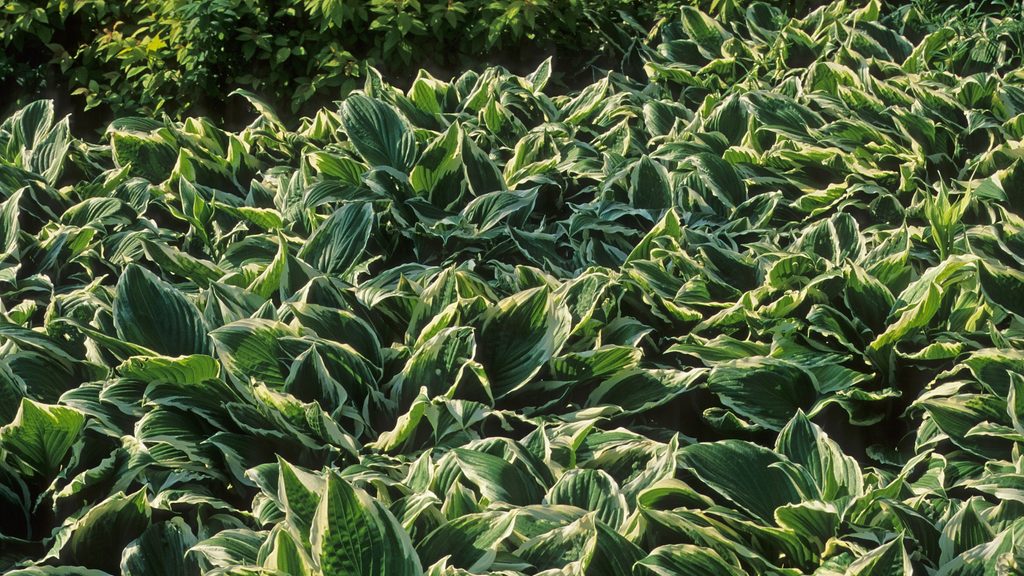
Hostas are slow to hit their stride but extremely long-lived. The first year after planting, most hostas put energy into root establishment — the foliage is smaller and less impressive than the mature plant will be. By year two or three, the plant hits full size and the foliage reaches its mature color and texture. From there, a well-sited hosta just keeps getting better — larger, fuller, and more dramatic with each passing season.
The ones along the north side of my house have been in the ground for years and they’ve become the defining feature of that bed. The division process has let me spread them throughout the shaded areas of the yard without buying a single additional plant. That’s the real payoff with hostas — patience in the early years turns into an expanding, self-sustaining garden that costs almost nothing to maintain.
Frequently Asked Questions About Planting and Caring for Hostas
How much sun can hostas tolerate?
Most hostas tolerate morning sun well — two to four hours of direct
morning light with afternoon shade is actually ideal for many varieties
and produces richer color than deep shade. What hostas don’t handle
well is afternoon sun, particularly in summer. The intense heat of
west-facing direct sun will scorch leaf edges and bleach out variegated
varieties. Blue-leaved varieties like Halcyon are the most shade-tolerant
and hold their color best with minimal direct sun.
How far apart should hostas be planted?
Space based on mature width, not current size. Most medium hostas
reach 24 to 36 inches wide at maturity — plant them 24 to 36 inches
apart on center. Large varieties like Sum and Substance can reach 4 to
5 feet across and need corresponding spacing. Planting too close is the
most common mistake — divisions planted a foot apart look fine for two
years and then require early division because they’ve crowded out.
Do hostas come back every year?
Yes — hostas are perennials that return reliably each spring from the
crown. In Zone 6a (central Indiana) and similar climates, they’re
cold-hardy without any special winter protection. The foliage dies back
completely after the first hard frost, which is normal. New growth
emerges in spring, and each year the clump typically comes back slightly
larger than the year before.
When is the best time to divide hostas?
Early spring is the most forgiving window — just as the shoots emerge
from the ground before the plant has invested energy in a full season
of foliage. Early fall (at least 30 days before first frost) is the
second-best option. Avoid dividing in midsummer heat, which stresses
both the parent plant and the divisions. If you divide in fall and
the divisions look rough, don’t panic — some wilting is normal as
roots reestablish.
What is eating my hostas at night?
Slugs are the most likely culprit — they feed at night and during wet
weather, leaving ragged holes through the leaf surface. The damage
pattern is distinctive: irregular holes anywhere on the blade, often
with a slightly silvery slime trail visible in morning light. Iron
phosphate-based slug bait applied in early spring before damage starts
is the most effective control, and it’s safe for use around pets and
wildlife. Deer also eat hostas — if the damage looks like whole leaves
have been stripped rather than chewed with holes, deer are the more
likely cause.