

Yardtally is reader-supported. Some links on this page are affiliate links. As an Amazon Associate, Yardtally earns from qualifying purchases. See our Affiliate Disclosure.
Knowing how to stain a wood fence is one of those projects that looks straightforward until you’re standing in the stain aisle trying to figure out the difference between semi-transparent and solid, oil-based and water-based, and whether you actually need a sprayer or a brush. I’ve done this job on my own fence and learned a few things the hard way — including why prep matters more than the stain itself, and why I’ll never go back to rolling it on by hand. This guide covers everything from the stain-vs-paint decision through the full application process, so you can get it done right the first time.
What’s in This Guide
Stain or Paint: Which One Does Your Fence Actually Need?
Choosing the Right Stain
What You’ll Need
Sprayer vs. Brush vs. Roller: Which Method Is Best?
How to Stain a Wood Fence: Step by Step
How Long Does Fence Stain Last?
What Does It Cost to Stain a Wood Fence?
Frequently Asked Questions
Stain or Paint: Which One Does Your Fence Actually Need?

This is the decision most fence guides skip over, but it’s the one that matters most. Stain and paint are not interchangeable — they work differently, last differently, and fail differently.
Stain penetrates the wood. It soaks into the fibers and protects from the inside, which means it won’t peel or chip even as it wears down. When a stained fence needs attention, you clean it and restain — no stripping, no scraping. That’s the biggest practical advantage of stain over paint for a fence.
Paint sits on top of the wood as a film. It looks sharp when fresh and gives you the most color options, but it seals the wood surface, which traps moisture when the film eventually cracks. Trapped moisture leads to rot. And when paint starts to fail, you have to scrape and strip before you can repaint — a job that’s far more labor-intensive than restaining. Paint makes sense on a fence that already has paint, or if you want a specific color that stain can’t give you. For bare wood, stain is almost always the smarter choice.
Choosing the Right Stain
There are three transparency levels and two base types to understand before you buy anything.
Transparency levels
Transparent stain lets the full wood grain show through and offers the least UV protection. It’s best on newer wood in good condition where you want a natural look. It typically needs reapplication every one to two years.
Semi-transparent stain adds color while still showing the grain. It’s the most popular choice for residential fences — good-looking, better UV protection than clear, and it lasts two to three years before needing a refresh.
Solid stain covers the grain completely like paint but still penetrates the wood rather than sitting on top. It’s the longest-lasting option, the most resistant to UV fading, and the right choice for older or rougher wood where the grain isn’t worth showing. It lasts three to five years and restaining is simpler than repainting when the time comes.
Oil-based vs. water-based
Oil-based stains penetrate deeply, are extremely durable, and are particularly good in climates with freeze-thaw cycles. The trade-off is longer dry time (24 to 48 hours between coats), stronger fumes, and cleanup with mineral spirits.
Water-based stains (also called acrylic or latex) have improved dramatically and are now the go-to for most homeowners — easier cleanup, lower fumes, and faster dry time (two to four hours). They don’t penetrate quite as deeply as oil-based but the difference in longevity is minimal with modern formulations.
For Indiana’s climate — hot summers, cold winters, and clay soil that holds moisture — a semi-transparent water-based exterior stain hits the right balance of durability and ease of application. The Ready Seal exterior wood stain is the one I’d point most homeowners toward — it’s a penetrating oil-based formula that doesn’t require a separate sealer, goes on with a sprayer or brush, and is forgiving on application.
What You’ll Need
Gather everything before you start — stopping mid-project to make a hardware run while stain is drying is a bad afternoon.
For cleaning and prep
Garden hose or pressure washer, stiff-bristle scrub brush, wood cleaner or deck wash, rubber gloves, safety glasses. If the fence has mold or mildew, add oxygen bleach to the prep list.
For application
Your choice of applicator (see sprayer vs. brush below), a
stain applicator pad or brush for back-brushing, painter’s tape, plastic sheeting or drop cloths to protect plants and concrete, stir sticks, and a bucket for pouring if you’re using a roller or brush.
For safety
Work gloves, safety glasses, and old clothes you don’t mind ruining. If you’re spraying, add a respirator — stain particles in the air are not something you want in your lungs, especially oil-based products.
Sprayer vs. Brush vs. Roller: Which Method Is Best?
This is one of the most searched questions about fence staining and the answer depends on your fence size and how much time you want to spend.
Sprayer (fastest, best results on large fences)
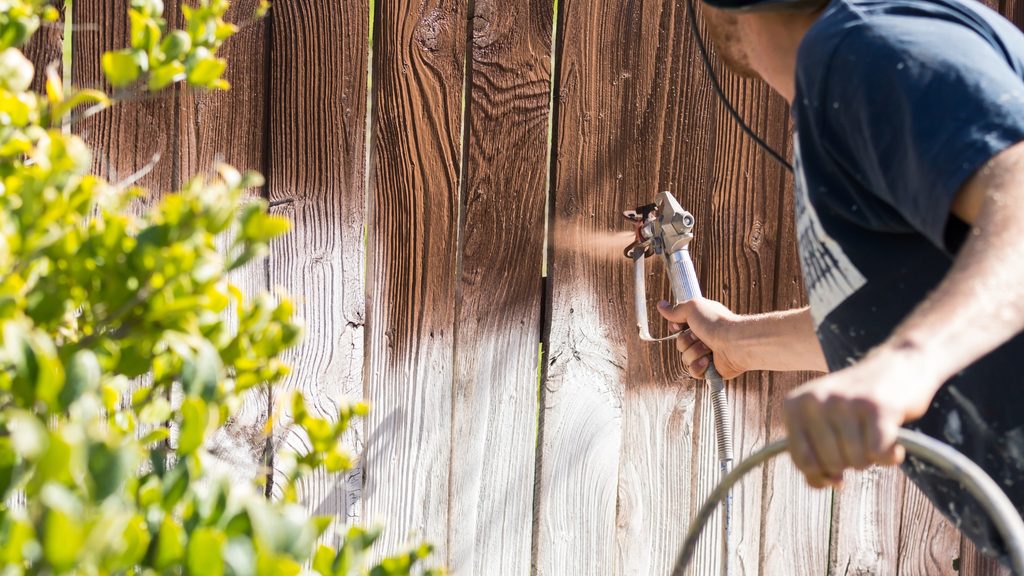
A sprayer is the fastest way to stain a fence and gives the most even coverage, especially on dog-ear pickets and rough-sawn boards where a brush misses texture and a roller skips the gaps between boards entirely. The catch: you need to mask off everything nearby — plants, concrete, siding — because overspray travels. Work on a calm day with no wind. The image at the top of this article shows exactly what a sprayer application looks like — the before-and-after contrast on those boards is achievable in a single pass.
For most residential fences, a battery-powered backpack sprayer handles the job well without the pressure inconsistency of a hand-pump model. Consistent pressure means consistent coverage, which means no streaks.
Brush (best for small areas and detail work)
A brush is the right tool for short sections, touch-ups, and getting into the gaps between pickets that a roller can’t reach. It’s slow on a full fence — plan on a full weekend for anything over 50 linear feet — but it gives you the most control over where the stain goes and how much gets applied. Always back-brush after spraying a section to work the stain into the grain.
Roller (faster than brush, slower than sprayer, compromises on coverage)
A roller works on flat fence boards but misses gaps between pickets and doesn’t penetrate texture as well as a brush or sprayer. If you use a roller, use a thick-nap cover (3/4 inch) and always go back over with a brush to work the stain into the grain. A roller alone is rarely sufficient for a fence — use it in combination with a brush, not instead of one.
How to Stain a Wood Fence: Step by Step
Step 1 — Check the fence condition
Before anything else, walk the fence and look for loose boards, popped nails, cracked pickets, or rot at post bases. Replace damaged boards and re-drive any nails that have worked loose. A stained fence looks great — a stained fence with visible damage still looks like a damaged fence. Address structural issues now, not after the stain is on.
Step 2 — Test the wood moisture
Spray a small section of fence with a garden hose and watch what happens. If water beads on the surface, the wood is either too new (still holds mill treatment), sealed, or wet — and stain won’t penetrate properly. If water soaks in within 30 seconds, the wood is ready. For new fence boards, wait 30 to 60 days before staining to let mill treatments dissipate. Why this matters: stain applied to wood that can’t absorb it sits on the surface, peels within a season, and leaves you with a worse-looking fence than if you’d waited.
Step 3 — Clean the fence
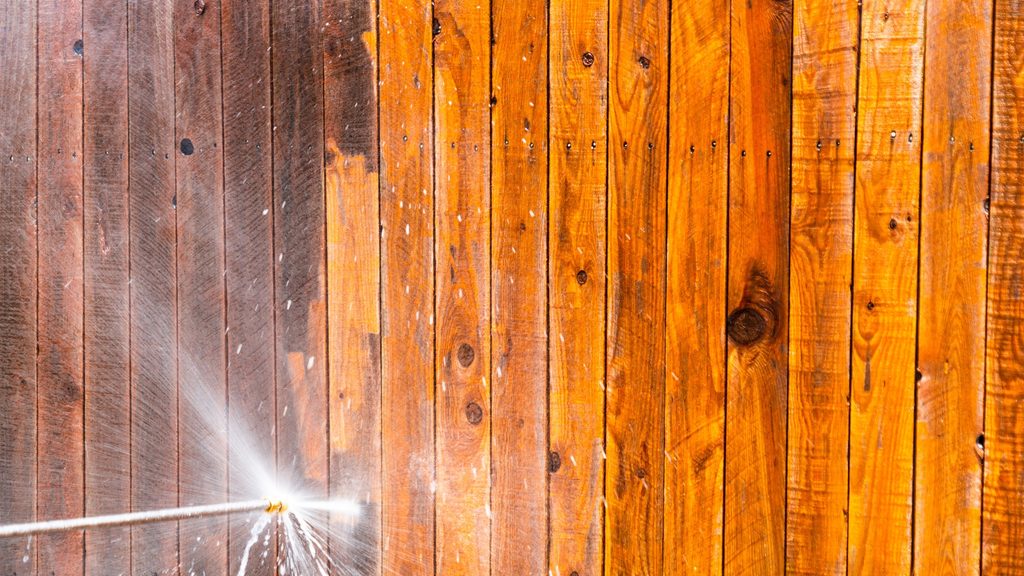
A pressure washer or a stiff brush with deck cleaner removes dirt, mold, mildew, and oxidized wood fibers that prevent stain from bonding. Work top to bottom and rinse thoroughly. Let the fence dry completely — two to three days in dry weather — before applying stain. Staining wet wood traps moisture and causes the stain to fail early.
If you see gray, weathered wood after cleaning, that’s normal — the cleaning process opens the grain and the wood will look lighter and more porous, which is exactly what you want for good stain penetration.
Step 4 — Protect what you’re not staining
Lay drop cloths or plastic sheeting over grass, plants, and any concrete at the fence base. If you’re spraying, extend the coverage out several feet on the spray side — overspray carries farther than you expect. Tape off any surfaces you don’t want stained: siding, brick, metal hardware.
Step 5 — Apply the stain
Stir the stain thoroughly before and during application — pigment settles and an unstirred can gives you uneven color. Pour a manageable amount into a bucket rather than working from the original can. Apply in the direction of the wood grain, working from top to bottom, maintaining a wet edge as you go. One board at a time if brushing; in three-foot vertical sections if spraying.
For picket fences: hit the front face of each picket first, then go back and catch the edges and gaps. For privacy fences: spray or roll the broad surface and back-brush immediately after each section to work the stain in.
Apply two thin coats rather than one heavy coat. A heavy single coat puddles, drips, and dries uneven. Two thin coats give you better penetration, more even color, and longer life.
Step 6 — Allow to dry and assess
Water-based stains dry to the touch in two to four hours. Oil-based stains need 24 to 48 hours. Check the manufacturer’s recoat time before applying a second coat — applying too soon traps solvents and causes adhesion problems. Once fully dry, walk the fence and look for thin spots, drips, or missed areas and touch up with a brush.
How Long Does Fence Stain Last?
The honest answer: two to five years, depending on stain type, wood species, sun exposure, and climate. Transparent stains on the short end, solid stains on the long end. Fences on the south or west side of a property fade faster due to direct afternoon sun. Indiana’s freeze-thaw cycles are harder on fence stain than climates that stay cold all winter — the repeated expansion and contraction works at the bond between stain and wood. Source: USDA Forest Products Laboratory — Wood Finishing: Exterior
The fastest way to extend the life of your stain job: don’t let overgrown plants press against the fence. Vegetation holds moisture against the wood and accelerates stain breakdown. Keep a six-inch clearance between plants and fence boards on the soil side.
What Does It Cost to Stain a Wood Fence?
DIY staining costs between $0.50 and $1.50 per square foot in materials — stain, cleaner, and applicators. A 150-foot privacy fence (six feet tall) has roughly 900 square feet of surface area, putting material costs at $450 to $1,350 depending on stain type and how many coats are needed. Plan on two gallons of stain per 200 square feet on rough wood, more on older or porous boards.
Hiring it out runs $1.50 to $3.50 per square foot for labor alone, plus materials — a full professional stain job on a 150-foot fence typically runs $1,500 to $3,500 depending on fence condition and your region. The DIY savings are significant, and staining is well within reach for most homeowners who can commit a weekend to the project.
Frequently Asked Questions About How to Stain a Wood Fence
Should I stain or paint a wood fence?
For bare wood, stain is almost always the better choice. Stain penetrates the wood rather than sitting on top, which means it won’t peel or chip as it wears. When it needs refreshing, you clean and restain — no scraping or stripping. Paint makes sense if you want a specific color stain can’t provide, or if the fence already has paint and you’re recoating. Putting paint on a bare wood fence creates a maintenance headache down the road when that film starts to crack and trap moisture.
How do I prepare a wood fence for staining?
Start with a thorough cleaning — pressure washer or stiff brush with deck cleaner to remove dirt, mold, mildew, and oxidized wood fibers. Let the fence dry completely, at least two to three days in dry weather. Do the water bead test before you start: spray a small section and watch whether water soaks in or beads up. If it beads, the wood isn’t ready — it’s still wet, sealed, or holding mill treatment. Stain applied to wood that can’t absorb it will peel within a season.
How often do you need to restain a wood fence?
Every two to five years depending on stain type and conditions. Transparent stains need attention every one to two years. Semi-transparent stains last two to three years. Solid stains are the longest lasting at three to five years. Fences on the south or west side of your property fade faster from direct afternoon sun. Indiana’s freeze-thaw cycles also accelerate stain breakdown compared to milder climates — factor that into your schedule.
Is a sprayer or brush better for staining a fence?
A sprayer is faster and gives more even coverage on large fences, especially on rough-sawn boards and dog-ear pickets where a brush misses texture. The trade-off is masking everything nearby since overspray travels. A brush gives you the most control and works well for small sections and touch-ups, but it’s slow on a full fence. Whatever method you use, always back-brush after spraying or rolling to work the stain into the wood grain — that’s what makes it last.
How much stain do I need for a wood fence?
Plan on roughly two gallons per 200 square feet for rough or older wood, more if the boards are very porous or weathered. A 150-foot privacy fence at six feet tall has about 900 square feet of surface area — that’s roughly nine gallons for two coats. Always buy a little extra so you’re not short mid-project. The formula: fence length × fence height × 2 (for two sides) gives you total square footage, then divide by your stain’s coverage rate listed on the can.