

Yardtally is reader-supported. Some links on this page are affiliate links. As an Amazon Associate, Yardtally earns from qualifying purchases. See our Affiliate Disclosure.
Before I sealed my own garage floor, I spent a lot of time researching what actually works versus what causes peeling and bubbling six months later. The answer almost always comes down to prep. Skipping the cleaning and etching steps is the number one reason garage floor coatings fail — and it’s completely avoidable. This guide walks you through every step the right way, so your floor comes out looking clean and holds up for years.
What’s in This Guide
- What You’ll Need
- How to Seal a Garage Floor: Step by Step
- Tips for a Better Finish
- Clear vs. Gray: Which Should You Choose?
- How Long Does a Sealed Garage Floor Last?
- Frequently Asked Questions
What You’ll Need
Gather everything before you start so you’re not stopping mid-project.
You’ll need a degreaser and an etching solution for prep, a floor scrub brush for scrubbing, a clear epoxy kit or the gray epoxy kit for the coating, a spiked roller kit for applying it, and painter’s tape to protect your walls and trim.
How to Seal a Garage Floor: Step by Step
Step 1: Clear the Garage
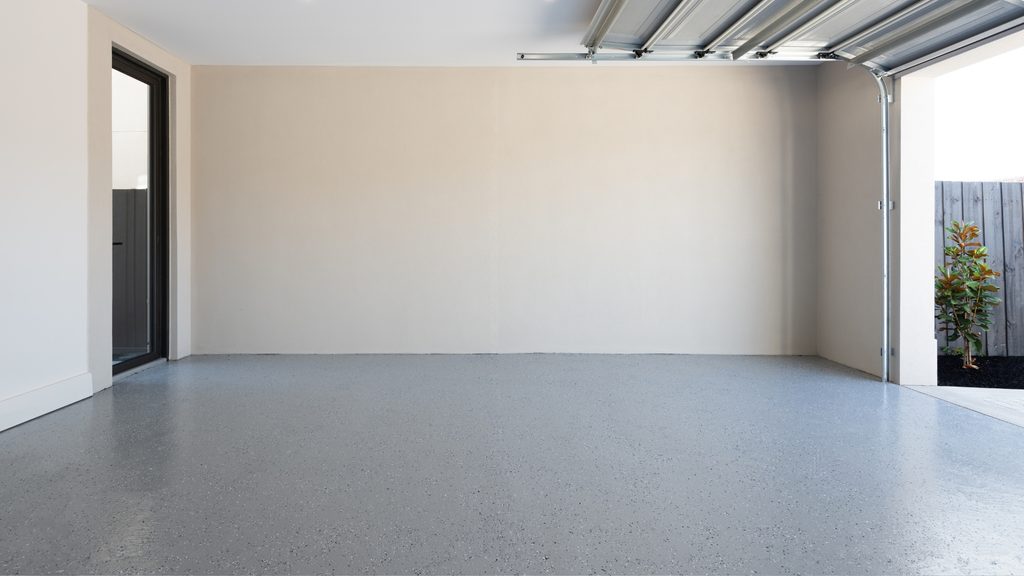
Move everything out — vehicles, storage bins, shelving, all of it. You need full access to the entire floor. This is also a good time to look for cracks, oil stains, or areas where a previous coating has peeled. Address any cracks before you start; a patched floor holds a coating far better than a cracked one. If you have existing cracks to deal with, our guide on fixing driveway cracks covers the same repair process that works on concrete garage floors.
Step 2: Degrease the Floor
Oil and grease are the enemy of any floor coating. If the concrete has even a thin film of grease, the epoxy won’t bond and you’ll see peeling within months. Apply a degreaser to the floor, scrub it in thoroughly with a floor scrub brush, and pay extra attention to spots where vehicles park — that’s where oil drips concentrate. Rinse well and let the floor dry completely before moving on.
Step 3: Etch the Concrete
Etching opens up the pores of the concrete so the epoxy can grip the surface. Without this step, even a perfectly clean floor can reject a coating over time. Apply an etching solution to the damp floor, scrub it in, and let it work according to the product directions. You’ll notice the surface start to look slightly rough or matte — that’s exactly what you want. Rinse thoroughly and allow the floor to dry completely, which can take 24 hours or more depending on humidity.
Step 4: Tape Off the Edges
Before you open the epoxy, run painter’s tape along the bottom of your walls, door trim, and anything else you want to protect. Epoxy is difficult to remove once it cures, so take your time here and press the tape down firmly at the edges.
Step 5: Mix and Apply the Epoxy Coating
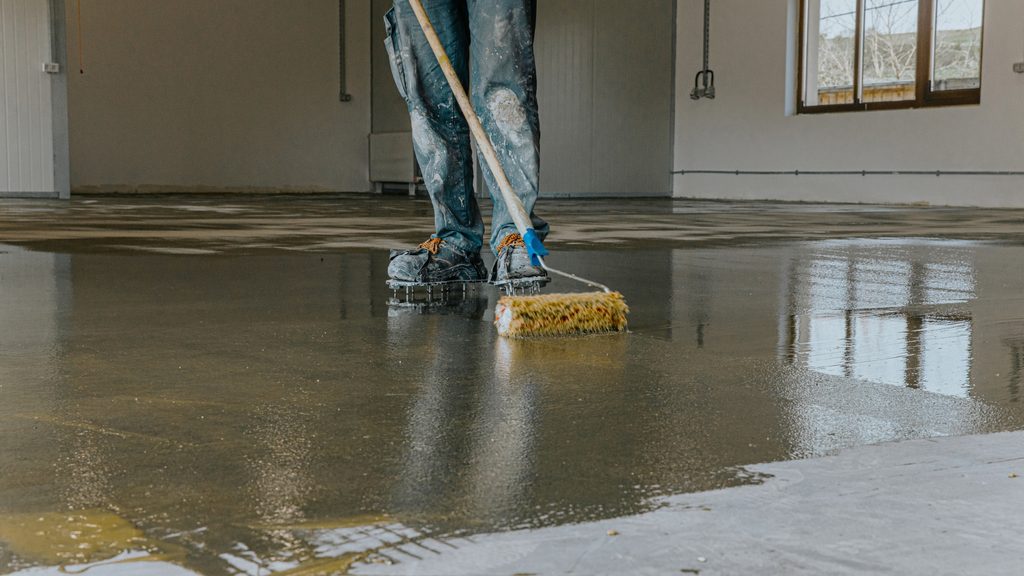
Follow the mixing instructions for your chosen kit carefully — both the clear and gray options include two parts that need to be combined before application. Once mixed, you typically have a working window of around 2 hours, so work efficiently. Pour the mixture onto the floor in sections and spread it with a spiked roller kit, which includes spiked shoe covers so you can walk on the wet coating without leaving footprints — it also releases air bubbles as you roll. Work from the back of the garage toward the door so you’re never rolling yourself into a corner.
Step 6: Apply Decorative Chips (Optional)
Most epoxy kits include decorative color flakes. If yours does, broadcast them into the wet coating immediately after rolling each section. Toss them in lightly from waist height and let them land randomly for a natural look. Don’t press them in — the coating will absorb them as it cures.
Step 7: Let It Cure Before Use
This is the step most people rush and regret. Light foot traffic is typically safe after 24 hours, but wait at least 72 hours before driving a vehicle onto the floor. Full cure takes about 7 days. Parking a car on it too soon is one of the most common causes of tire marks and surface damage on fresh epoxy. Source: Rust-Oleum — EpoxyShield Garage Floor Coating
Tips for a Better Finish
A few things I picked up while researching this project that don’t always make it into the instructions.
Temperature matters. Epoxy won’t bond properly below 50°F or above 90°F. Plan your project for a mild day and make sure the floor itself — not just the air — is within that range. A floor that’s been cold overnight can take hours to warm up even on a warm day.
Moisture is the other killer. Before you start, tape a piece of plastic sheeting to the floor for 24 hours. If you see condensation underneath it, the concrete is too wet to coat. This is common in spring and in basements.
If you have an older floor with a previous coating, test for adhesion first. Pour a small amount of water on the surface. If it beads up instead of soaking in, the old coating is still sealing the concrete and the new epoxy won’t bond — you’ll need to grind or strip the old coating first.
Clear vs. Gray: Which Should You Choose?
The clear kit lets the natural concrete color show through and works well if your floor is in good shape and you want a clean, subtle finish. The gray kit hides imperfections better, gives the floor a finished garage look, and is the more popular choice for most homeowners. If your floor has staining or uneven color, go gray. If you want something understated that lets decorative chips do the visual work, clear is the move.
How Long Does a Sealed Garage Floor Last?
A properly applied epoxy coating on a well-prepped floor typically lasts 5–10 years under normal residential use. Heavy vehicle traffic, road salt tracked in during winter, and hot tire pickup (where tires soften the coating in summer heat) are the main things that shorten its lifespan. Keeping the floor clean and avoiding harsh chemicals will help it last toward the longer end of that range.
Frequently Asked Questions About How to Seal a Garage Floor
What is the best product to seal a garage floor?
Epoxy coating is the most durable option for residential garage floors. Rust-Oleum EpoxyShield is the standard choice — available in a clear kit that lets the natural concrete show through or a gray kit that hides imperfections and gives the floor a finished look. For most homeowners whose floors have staining or uneven color, the gray kit is the better choice. Clear works well on floors that are already in good shape and you want a subtle, low-profile finish.
Do I need to etch concrete before sealing a garage floor?
Yes — skipping the etch is the number one reason garage floor coatings peel. Etching opens the pores of the concrete so the epoxy can mechanically bond to the surface. Without it, even a spotlessly clean floor can reject the coating over time. Apply the etching solution to a damp floor, scrub it in, and let it work per the product directions until the surface looks slightly rough or matte. Rinse thoroughly and allow the floor to dry completely — at least 24 hours — before applying the coating.
How long do I need to wait before driving on a sealed garage floor?
Wait at least 72 hours before driving a vehicle onto a fresh epoxy coating. Light foot traffic is typically safe after 24 hours, but vehicle weight and tire heat are a different story. Full cure takes about 7 days. Parking a car on it too soon is one of the most common causes of tire marks and surface damage on fresh epoxy — the coating looks dry but hasn’t reached full hardness yet.
Why is my garage floor epoxy peeling?
Peeling almost always comes down to one of three prep failures. The most common is oil or grease left on the concrete — even a thin film prevents the epoxy from bonding. The second is skipping the etch step, which leaves the concrete surface too smooth for the coating to grip. The third is moisture — if the concrete is holding moisture from below, the epoxy lifts as vapor pressure builds under it. Before your next application, tape plastic sheeting to the floor for 24 hours; condensation underneath means the floor is too wet to coat.
Can I seal a garage floor myself?
Yes — garage floor sealing is a manageable DIY project if you follow the prep steps correctly. The work itself is straightforward: degrease, etch, tape off edges, mix the epoxy, and roll it on. The part most people underestimate is the drying time between steps and the full cure period before vehicle use. Plan for a project spread across two to three days, and choose a day where temperatures will stay between 50°F and 90°F — epoxy won’t bond properly outside that range.