
Yardtally is reader-supported. Some links on this page are affiliate links. As an Amazon Associate, Yardtally earns from qualifying purchases. See our Affiliate Disclosure.
Learning how to resurface countertops can save you anywhere from $1,500 to $5,000 compared to a full replacement. I researched every major DIY method before tackling my own, and what I found is that the results vary a lot depending on which approach you choose. Some hold up beautifully for five-plus years. Others start looking rough within six months and leave you wishing you’d just saved up for the real thing. This guide breaks down exactly what works, what doesn’t, and how to do it right.
What’s in This Guide
- The Honest Truth: Not All Resurfacing Methods Are Equal
- What You’ll Need (Epoxy Kit Method)
- How to Resurface Countertops with an Epoxy Kit: Step by Step
- How Long Does Countertop Resurfacing Last?
- Tips for Making It Last
- Is Resurfacing Worth It, or Should You Just Replace Them?
- FAQ
The Honest Truth: Not All Resurfacing Methods Are Equal
Before you spend a weekend on this project, it’s worth knowing upfront that the method you choose matters more than the execution. The difference between a countertop that looks great in three years and one that’s peeling at the edges in six months usually comes down to one decision: epoxy kit or contact paper.
Here’s the breakdown by method, from most durable to least:
Epoxy Paint Kits (Best Results, Most Effort)
Epoxy-based countertop kits are the clear winner if you want something that will actually hold up. Products like the Giani Marble Easy Epoxy Countertop Paint Kit bond directly to laminate and tile surfaces, creating a hard, glossy finish that can last three to five years with normal kitchen use — and longer in lower-traffic areas like bathrooms or laundry rooms. Real-world users consistently report two to four years of solid performance, and some have hit five with proper care.
The process takes a full weekend. You’ll clean and lightly sand the surface, apply a primer coat, build up the color layers (this is where you create the stone veining effect), then pour or roll on the epoxy topcoat. The epoxy needs 24 hours before light use and a full week to fully cure — don’t put heavy items on it or scrub it during that window.
What to watch out for: prep is everything. If you skip the sanding step or don’t clean the surface thoroughly, the epoxy won’t bond properly and you’ll see peeling within months. Also keep in mind that epoxy is not heat-resistant — always use trivets, never set a hot pan directly on the surface.
Countertop Paint Kits — Granite Look (Good for Low-Traffic Areas)
The Giani Countertop Paint Kit – Granite is a paint-based system (not full epoxy) that uses a mineral sponging technique to mimic the look of granite. It’s easier to apply than the marble epoxy kit and produces a convincing stone finish. In a bathroom or laundry room, it can last five-plus years without issues. In a busy kitchen, expect two to three years before the clearcoat starts to show wear near the sink and high-use zones.
The same prep rules apply: clean thoroughly, scuff the surface, and don’t rush the drying time between coats. A foam roller set gives you a smoother finish than cheap rollers that leave texture in the clearcoat.
Peel-and-Stick Tile Mats (Mediocre Results, Skip Unless Renting)
A Double-Sided Adhesive Tile Mat can transform a countertop surface without any painting or curing time. The appeal is obvious — no mess, no fumes, done in an afternoon. And honestly, if you’re renting and just need something to look better for a year or two, it’s not a terrible option.
But there are real limitations. Grout lines collect grime fast and are hard to clean around a kitchen sink. The adhesive can lift at edges with repeated water exposure. And if your countertop has any texture or imperfections, those will telegraph through. This method works best on a flat, smooth surface in a dry area. For a main kitchen countertop, it’s not the long-term solution it looks like on the packaging.
Contact Paper / Adhesive Film (Looks Cheap, Degrades Fast)
I’m going to be direct here: adhesive countertop film is the weakest option on this list for anything resembling a permanent fix. It looks fine in photos and genuinely bad in person — the seams show, the edges lift near water, and the surface doesn’t hold up to daily kitchen use. Most contact paper starts peeling at the sink edge within six months, and removal is messier than people expect because the adhesive doesn’t release cleanly.
Where it does make sense: temporary situations. If you’re renting and can’t paint, or you need the kitchen to look presentable for a showing while the house is listed, contact paper is fast and cheap. Just go in knowing it’s a short-term fix, not a resurfacing solution.
What You’ll Need (Epoxy Kit Method)
For the epoxy paint approach — which is what I’d recommend for most homeowners — here’s what to gather before you start:
- — Epoxy countertop kit — PICK ONE: Giani Marble Easy Epoxy Countertop Paint Kit OR Giani Countertop Paint Kit – Granite, you don’t need both
- — Foam roller set for applying the epoxy topcoat smoothly
- — Premium painter’s tape to mask cabinet faces, walls, and the sink edge
- — Fine-grit sandpaper (150–220 grit) for scuffing the surface — typically included in the kit
How to Resurface Countertops with an Epoxy Kit: Step by Step
Step 1: Clear and Deep-Clean the Surface
Remove everything from the countertop and clean it thoroughly with a degreaser or dish soap and water. Follow up with a wipe-down using rubbing alcohol or a TSP substitute to strip any residual grease or wax. Any contamination left on the surface will prevent adhesion. Source: Giani Granite — Countertop Preparation Instructions
Step 2: Lightly Scuff the Surface
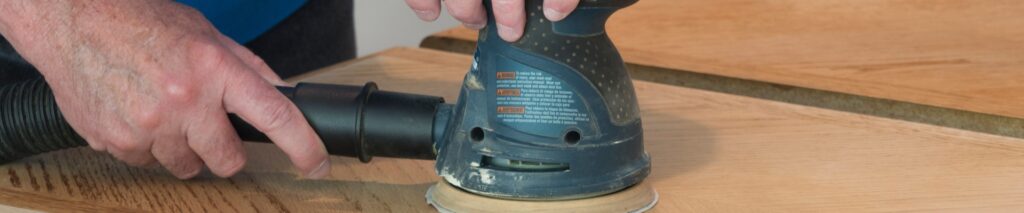
Use 150–220 grit sandpaper to scuff the entire countertop. You’re not trying to remove material — just dulling the finish so the primer has something to bite into. Wipe up all dust with a tack cloth or damp rag and let it dry completely.
Step 3: Tape Off Everything
Mask the cabinet faces, backsplash walls, and the rim of the sink with Premium painter’s tape. Run two rows of tape on walls if you’re going right up to a backsplash — epoxy drips and splatters more than regular paint.
Step 4: Apply the Primer Coat
Roll on the included primer using a foam roller set and let it dry fully per the kit instructions — usually two to four hours. Don’t rush this step. The primer coat is what gives the topcoat something to bond to, and cutting corners here is the most common reason epoxy jobs fail early.
Step 5: Build the Color and Texture Layers
This is where you create the stone effect. Each kit has a slightly different technique — the marble epoxy kit uses a sponge to build veining; the granite paint kit uses a mineral sponging approach with multiple colors. Work in small sections and follow the kit’s tutorial video closely. Both Giani kits include a practice board, which is worth using before you commit to the actual countertop.
Step 6: Apply the Epoxy Topcoat
Pour or roll on the epoxy topcoat evenly across the entire surface. This is the protective layer that determines how long the finish lasts, so don’t skip it or apply it too thin. The epoxy will self-level to some degree, but use your roller to spread it evenly and catch any drips at the edges.
Step 7: Let It Cure — Don’t Rush It
The surface will feel dry to the touch within 24 hours, but the epoxy is still chemically hardening for several days. Wait at least 24 hours before light use, and give it a full week before putting heavy items on it or cleaning with anything abrasive. The full cure is what gives the finish its long-term hardness and scratch resistance.
How Long Does Countertop Resurfacing Last?
With proper prep and a quality epoxy kit, you can realistically expect three to five years in a busy kitchen and five-plus years in a bathroom or laundry room. The finish holds up well to daily wiping and normal use, but it’s not indestructible — hot pans, sharp knives used directly on the surface, and harsh cleaners will shorten its life. Treat it the same way you’d treat a painted wood surface: with some basic care, it lasts. Without it, it doesn’t.
Paint-based granite kits trend toward the two to three year range for kitchen use. Contact paper and tile mats start showing wear within six to twelve months under daily kitchen conditions.
Tips for Making It Last
- Always use trivets — epoxy countertop finishes are not heat-resistant. A hot cast iron pan will damage the finish permanently.
- Use a cutting board — don’t slice directly on the surface. The finish will scratch.
- Clean with mild soap and water or a granite cleaner on a soft cloth. Avoid bleach, ammonia-based cleaners, or anything abrasive.
- Wait the full cure time before putting anything heavy or wet on the surface. This is the step most people skip, and it’s the reason most early failures happen.
Is Resurfacing Worth It, or Should You Just Replace Them?
If your countertops are structurally solid — no cracks, no soft spots, no delaminating edges — resurfacing is worth doing. A quality epoxy kit runs $80–$150 and can buy you three to five more years before you need to make a bigger decision. That’s a reasonable trade.
If the substrate is damaged, resurfacing won’t fix it. Paint and epoxy bond to the surface, not to the structure underneath. If there’s significant delamination, water damage, or soft spots, you’re better off replacing. Our guide to best countertop material for heat and stain resistance breaks down quartz, granite, porcelain, and butcher block so you know exactly what you’re comparing against before committing to either path.
Frequently Asked Questions About Resurfacing Countertops
How long does countertop resurfacing last?
With proper prep and a quality epoxy kit, expect three to five years in
a busy kitchen and five-plus years in a bathroom, laundry room, or
lower-traffic area. The finish holds up well to daily wiping and normal
use but isn’t indestructible — hot pans, knives used directly on the
surface, and harsh cleaners all shorten its lifespan. Treat it the way
you’d treat a painted wood surface: basic care extends it significantly.
Paint-based granite kits trend toward two to three years for kitchen use.
Contact paper and tile mats start showing wear within six to twelve months
under daily kitchen conditions.
Can you resurface laminate countertops?
Yes — laminate is the most common substrate for DIY countertop resurfacing
and what epoxy kits are specifically designed for. The key is proper prep:
clean thoroughly with a degreaser, wipe down with rubbing alcohol or TSP
substitute, and lightly scuff the surface with 150 to 220 grit sandpaper
so the primer has something to bond to. Skip the sanding and the epoxy
won’t adhere properly — peeling within months is the result. The epoxy
bonds to the scuffed laminate surface, not to the original finish, so prep
quality directly determines how long the resurfacing job lasts.
What is the best product to resurface countertops?
For the most durable result, an epoxy-based countertop kit — like the
Giani Marble Easy Epoxy or Giani Granite Paint Kit — is the clear winner.
Both bond directly to laminate and tile, create a hard glossy finish, and
can last three to five years with proper care. The epoxy kit requires more
effort and a full weekend to complete but produces results that look
genuinely good and hold up. Paint-based systems are easier to apply but
not as durable. Contact paper and peel-and-stick tile mats are the weakest
options — they look fine in photos and degrade quickly in daily kitchen use.
Can you resurface countertops yourself?
Yes — it’s a realistic DIY project for most homeowners. The epoxy kit
method takes a full weekend: one day for prep and base coats, one day for
the epoxy topcoat and cure time. The skills required are basic — cleaning,
taping, rolling — and both the Giani marble and granite kits include
practice boards and tutorial videos. The most common DIY mistake is rushing
the prep (not cleaning or scuffing thoroughly enough) or not waiting the
full cure time before using the surface. A properly prepped and cured
epoxy countertop is indistinguishable from a professional job in photos
and in person.
Do I need to sand countertops before painting or resurfacing?
Yes — light sanding with 150 to 220 grit sandpaper is required before
applying any epoxy or paint-based resurfacing product. You’re not trying
to remove material — just dulling the existing finish so the primer has
something to bite into. Shiny laminate surfaces repel paint and epoxy
without this step. After sanding, wipe up all dust with a tack cloth or
damp rag and let the surface dry completely before applying primer. Any
dust left behind will show in the finish as bumps or adhesion failures.