
Yardtally is reader-supported. Some links on this page are affiliate links. As an Amazon Associate, Yardtally earns from qualifying purchases. See our Affiliate Disclosure.
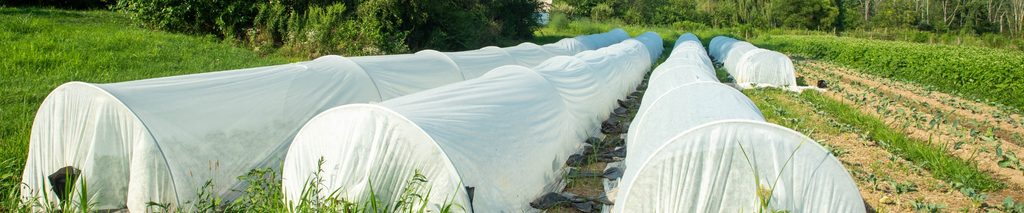
Row covers for garden beds are one of those tools that experienced gardeners use routinely and beginners discover too late in the season. I’ve been researching them before adding them to my own raised beds — and what I found is that a single lightweight row cover can extend both ends of the growing season by two to four weeks each, which in Indiana means more time in spring before summer heat kills lettuce and more time in fall before frost ends everything. The material is inexpensive, reusable, and doesn’t require any permanent structure.
This guide covers what row covers actually do, how to choose the right weight for the job, how to install them correctly, and which crops benefit most from each type.
What’s in This Guide
- What Row Covers Actually Do
- The Three Weights — Which One You Need
- What You’ll Need to Install Row Covers
- How to Install Row Covers — Step by Step
- When to Use Row Covers — By Season
- Which Crops Benefit Most
- Care and Storage
- FAQ
What Row Covers Actually Do
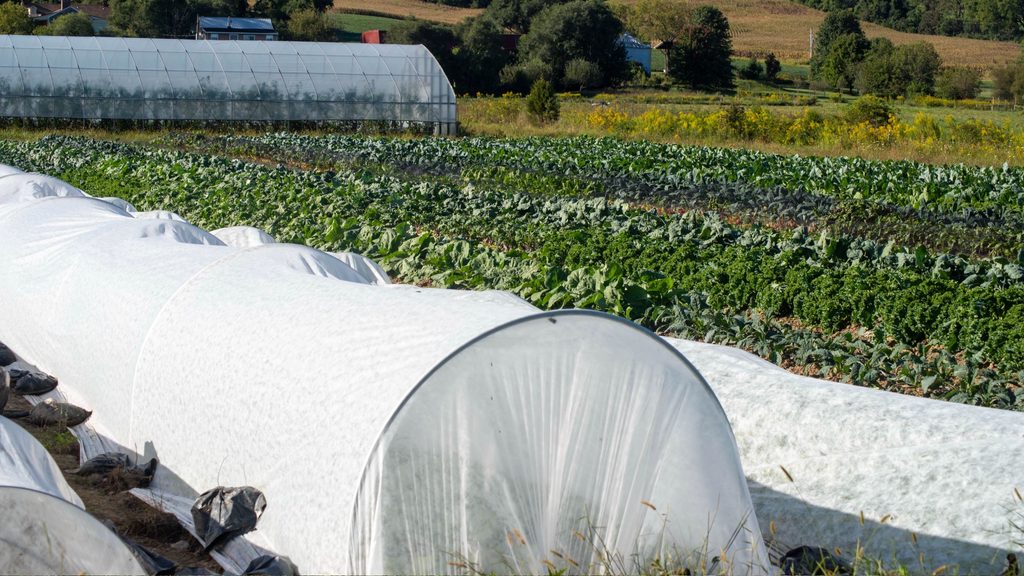
Row covers are lightweight, non-woven fabric — typically spun-bonded polyester or polypropylene — that creates a microclimate around the plants underneath. They trap heat that radiates from the soil at night, reducing the effective temperature drop that plants experience during cold snaps. During the day, they allow air, water, and sunlight to pass through while moderating temperature extremes.
According to University of Maryland Extension, row covers provide two to eight degrees Fahrenheit of frost protection depending on fabric weight — enough to protect tender crops from a light frost, and enough on the heavier end to keep overwintering crops alive through hard freezes.
Beyond temperature, row covers do something most beginners don’t expect: they’re excellent organic pest barriers. A row cover installed at planting time and sealed at the edges prevents flying insects from accessing the crop entirely. Flea beetles, aphids, cabbage moths, cucumber beetles — any pest that arrives by air gets excluded without any spray. This makes row covers one of the most effective organic pest management tools available to home gardeners.
The Three Weights — Which One You Need
Row cover fabric comes in three weight ranges, each designed for different purposes. Choosing the wrong weight is the most common mistake — a lightweight insect barrier won’t protect against frost, and a heavyweight frost cover will overheat crops in spring sunshine.
Lightweight (0.3 to 0.5 oz per square yard) — Insect Barrier
Lightweight row covers allow 90 to 95 percent light transmittance and provide only about 2°F of frost protection. They’re designed to be left on crops from planting through harvest as an insect barrier rather than a frost protector. Crops underneath grow essentially unaffected — light, water, and air pass through freely. This weight is ideal for brassicas (cabbage, broccoli, kale) where cabbage moths are a persistent problem, for carrots where carrot fly is an issue, and for any crop where flying insect pressure is the primary concern rather than temperature.
Medium Weight (0.5 to 1.0 oz per square yard) — Spring and Fall Extension
Medium-weight row covers allow 70 to 85 percent light transmittance and provide 4 to 6°F of frost protection. This is the most versatile weight for home gardeners — it extends the spring season by allowing earlier planting, protects fall crops through light frosts, and can be left on during cloudy spring weather without concern about overheating. It’s the weight to reach for when frost protection is the goal alongside some insect protection.
Heavyweight (1.5 to 2.2 oz per square yard) — Hard Frost and Overwintering
Heavyweight row covers allow only 30 to 50 percent light transmittance and provide up to 8°F of frost protection. This weight is designed for overwintering hardy crops — kale, spinach, carrots, leeks — and for protecting plants through significant cold events. The trade-off is that the reduced light transmittance means it can’t be left on indefinitely during the growing season without affecting plant growth. Remove it or replace it with a lighter weight once temperatures moderate in spring.
A medium-weight floating row cover is the best starting purchase for most home gardeners — it covers the widest range of situations from late spring frosts through early fall cold snaps.
What You’ll Need to Install Row Covers
The cover itself is straightforward — it comes in rolls of various widths and lengths. What makes the difference between a row cover that works and one that blows off, sags, or traps condensation is the support and anchoring system.
Hoops
Hoops support the cover above the plants rather than letting it rest directly on the foliage. Direct contact between cover and plant isn’t always a problem — lightweight covers can float directly on crops without damage — but for taller plants, heavy fruiting crops, or anything where the weight of the fabric might cause damage, hoops keep the cover elevated and improve airflow. Wire hoops, PVC pipe bent into arches, or purpose-made hoop kits all work. Spacing depends on plant height — typically every 3 to 4 feet for most garden rows.
Anchoring
Row covers that aren’t anchored at the edges blow off in wind, defeating the purpose. Options: landscape staples pinned along the edges into the soil, sandbags or rocks laid along the fabric perimeter, clips that attach the fabric to raised bed frames, or soil mounded along the edges. For raised beds, U-shaped clips designed for row covers make the cleanest installation — they attach directly to the bed frame without needing anything in the soil.
Row cover clips designed for raised bed frames are the cleanest anchoring solution — no digging, no rocks, and the cover stays secured through wind.
Wire Hoops
Purpose-made wire hoops sized for garden beds are the easiest hoop system for most home gardeners — they push directly into the soil or soil-free raised bed mix and arch to the right height without any cutting or assembly. A garden hoop kit that includes everything you need is the fastest way to get a proper support system in place without sourcing materials separately.
How to Install Row Covers — Step by Step
Step 1 — Prepare the Bed
Plant your seeds or transplants first. If you’re using the cover as a pest barrier from day one, install it immediately after planting before any insects can establish. If you’re using it for frost protection, you can install it any time but having it ready before a forecast frost means you’re not scrambling at 10pm.
Step 2 — Install Hoops
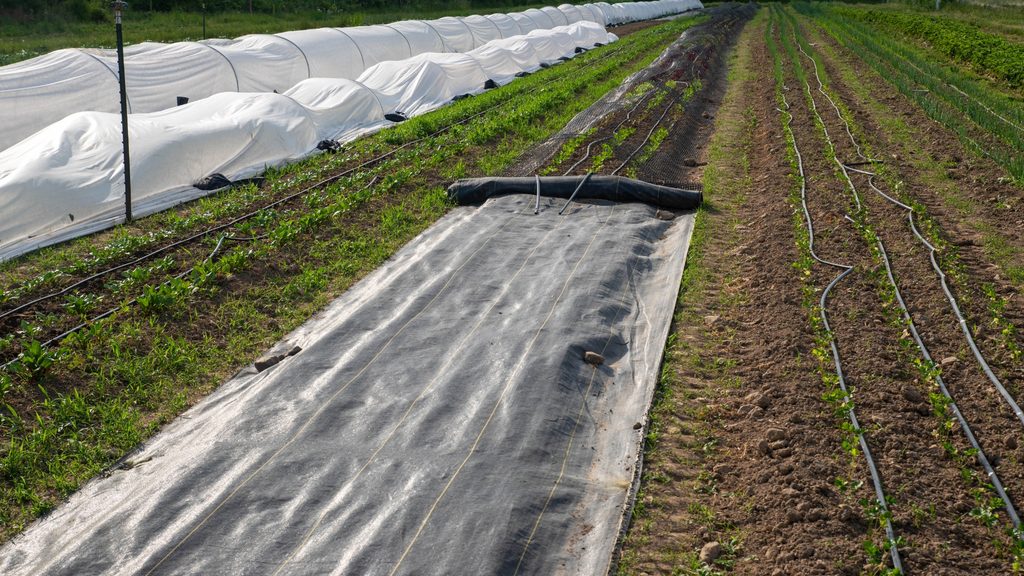
Push hoops into the soil or bed mix at 3 to 4 foot intervals along the bed length. Hoops should arch high enough that the fabric clears the tallest plant at maturity — not just at the time of installation. Underestimating plant height is the most common hoop mistake; seedlings that seem small will grow to push against the cover within weeks.
Step 3 — Drape the Cover
Unroll the cover over the hoops, leaving equal overhang on both sides and at each end. The overhang is what you’ll anchor to the ground or bed frame — plan for at least 12 inches of extra fabric on each side for anchoring. Don’t pull it tight across the hoops; leave some slack so wind doesn’t stress the fabric or pull it off the anchors.
Step 4 — Anchor the Edges
Secure all four sides — not just the ends. A row cover anchored only at the ends will channel wind under the sides and act like a sail. Use clips, landscape staples, or rocks along the full perimeter. For in-ground beds, you can also mound a thin layer of soil along the fabric edges, which creates a seal and keeps ground beetles from entering.
Step 5 — Monitor and Vent When Needed
On warm, sunny days — particularly with medium or heavyweight covers — temperatures under the fabric can climb well above ambient air temperature. This is beneficial in early spring but can stress or bolt cool-season crops in late spring or early summer. Check the temperature under the cover on the first sunny day after installation and lift or vent the cover if plants show heat stress. Lightweight covers generally don’t need venting.
When to Use Row Covers — By Season
Early Spring
Row covers allow you to plant 2 to 4 weeks earlier than your normal last frost date in Indiana. Start with transplants of cold-tolerant crops — lettuce, spinach, kale, broccoli, cabbage — under medium-weight covers when outdoor temperatures are still dipping into the 20s at night. The cover keeps the microclimate above freezing while the plants establish. As temperatures rise and frost risk passes, switch to a lightweight cover for insect protection or remove it entirely.
Late Spring and Summer
Switch to lightweight covers for summer pest protection on brassicas, carrots, and other crops with serious insect pressure. Remove covers entirely from crops that require pollination — squash, cucumbers, tomatoes, peppers — unless you’re manually pollinating or opening the covers daily during flowering hours to allow bee access. Leaving a medium or heavyweight cover on fruiting crops through summer will also overheat them.
Fall
Fall is where row covers pay off most dramatically for most Indiana gardeners. A medium-weight cover installed over established crops in September extends the harvest by 3 to 6 weeks past what an unprotected planting would survive. Lettuces, kale, spinach, arugula, carrots, and brassicas all benefit significantly. In a mild fall, a cover can keep these crops productive through November — a full month past when an unprotected planting would be finished.
The key is installing the cover before the first hard frost rather than after. Once severe frost damage has occurred, the crop is already set back significantly. Check the extended forecast in late September and have the cover ready to go when overnight temperatures start dropping consistently below 35°F.
Which Crops Benefit Most
Not every crop needs a row cover — warm-season crops like tomatoes, peppers, and squash don’t benefit from the insect exclusion and will be harmed by the heat retention in summer. These are the crops where row covers provide the most value:
Lettuce and salad greens — both ends of the season. Spring extension prevents early bolting; fall extension keeps salad greens productive well past first frost. The crop that benefits most from row covers in a typical home garden.
Brassicas (broccoli, cabbage, kale, cauliflower) — lightweight covers prevent cabbage moths from laying eggs on the leaves, which eliminates the caterpillar damage that makes unprotected brassicas look like lace by August. Install at transplant and leave on through harvest.
Carrots — lightweight covers exclude carrot fly, which lays eggs at the soil surface and whose larvae bore into the roots. Cover from seed through harvest for clean, undamaged roots.
Spinach and arugula — heavy fall producers under medium-weight covers, surviving temperatures that would kill exposed plantings. Both can overwinter under heavyweight covers in Zone 6a with reliable spring harvest.
Strawberries — medium-weight covers installed in early spring accelerate fruit ripening by 1 to 2 weeks by warming the microclimate during the critical flowering period.
Care and Storage
Row cover fabric is reusable for multiple seasons with basic care. After the season ends, shake out debris, rinse with a garden hose if heavily soiled, and let dry completely before storing. Fold loosely rather than rolling tightly to avoid permanent creases. Store out of direct sunlight — UV exposure breaks down the fabric over time, which is why covers left on through summer eventually become brittle. Most medium-weight covers last 3 to 5 seasons with reasonable care.
For the best results in your garden, pair row covers with a well-planned planting schedule. Our guide on the easiest vegetables to grow for beginners covers which crops are the most forgiving to start with — and most of them are the same crops that benefit most from row cover protection.
If you’ve built raised beds and want to use row covers over them, our guide on how to build a raised garden bed covers the construction process including irrigation setup — row covers work particularly well over raised beds because the defined edges make anchoring straightforward.
Frequently Asked Questions About Row Covers for Garden
How much warmer do row covers keep plants?
It depends on the fabric weight. Lightweight row covers provide about
2°F of frost protection — useful as an insect barrier but not adequate
for frost events. Medium-weight covers provide 4 to 6°F of protection,
which is enough to protect tender crops through a light frost in the
28 to 32°F range. Heavyweight covers provide up to 8°F of protection,
suitable for overwintering hardy crops through hard freezes. According
to University of Maryland Extension, these temperature gains are
consistent across different cover brands at the same weight class —
the weight of the fabric is what determines protection, not the brand.
Do row covers need to be removed during the day?
Lightweight covers generally don’t need to be removed — light
transmittance is high enough and heat buildup is minimal even on
warm days. Medium and heavyweight covers should be monitored on warm
sunny days, particularly in late spring when outdoor temperatures are
already climbing. Temperatures under a medium or heavyweight cover
can run 5 to 15°F above ambient on sunny days, which can stress cool-
season crops and cause bolting in lettuce and spinach. Vent or remove
covers on days when temperatures exceed 60°F if you’re growing cool-
season crops, and remove entirely on days above 70°F.
Can row covers get wet or stay out in rain?
Yes — row cover fabric allows rain to pass through, which is one of
its advantages over plastic sheeting. You don’t need to remove covers
before rain or water through them separately for most installations.
The exception is hand-watering — it’s more efficient to pull the cover
back, water directly at the root zone, and replace it. For drip
irrigation or soaker hose systems run under the cover, no adjustment
is needed — water passes through the fabric normally. After heavy rain
the fabric may sag between hoops; adjust it back into position to
maintain airflow.
Do row covers work against deer and rabbits?
Yes — a row cover installed with edges secured tightly to the ground
is an effective physical barrier against rabbits and most small animals.
For deer, the barrier effect depends on how securely the cover is
anchored and how determined the deer are — a lightweight floating
cover won’t stop a persistent deer, but a cover on a sturdy hoop
frame with edges firmly anchored is more effective. For serious deer
pressure, a heavier cover on a rigid frame or a separate physical
fence is a more reliable solution than row cover alone.
When should I remove row covers in fall?
For most cool-season crops, leave the cover on as long as the crop
is producing — many lettuces, kale, spinach, and arugula will survive
under a medium-weight cover through November in Indiana and similar
Zone 6 climates. Remove or lift the cover periodically to harvest,
check for pests, and hand-water if needed. Remove the cover entirely
when the crop has finished or when temperatures drop low enough that
even covered plants can’t survive — typically sustained overnight lows
below 20°F for lightweight covers and below 15°F for medium-weight.
At that point, heavyweight covers or cold frames are the next level
of protection.